SP2010 Forcing previously deployed file to update to latest version in site definition
/
I’m a big fan of quickly making changes to my SharePoint JavaScript file in SharePoint Designer and then test whether they work correctly in the browser. Quick browser refresh and I’m testing.
But I don’t recommend this on your test or production environments. For those cases, you should package your JavaScript files into a solution and deploy them.
SharePoint 2013 ReplaceContent Attribute
SP2013 introduced a new attribute ReplaceContent=”True” http://msdn.microsoft.com/en-us/library/office/ms459213(v=office.15).aspx when this attribute is set to True, when your feature is activated it will replace existing files on SharePoint with the contents of the files from the package. This attribute is excellent for deploying JavaScript files.
SharePoint 2010 IgnoreIfAlreadyExists Attribute
In SP2010, you aren’t as lucky. The IgnoreIfAlreadyExist attribute needs to be set to true. Otherwise your feature will most likely fail to activate if a file already exists. This is troublesome because with the ignore flag on, your JavaScript files won’t update to the latest new version.
There are a few approaches that people take. Some chooses to delete all the assets when deactivating the feature. Then on reactivation, the assets are recreated brand new with the latest bits. This works fine for CSS, JavaScript files, but will not work for MasterPage or PageLayout files that are in use.
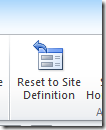
Add Reset to Site Definition
I propose this fantastic method:
SPFile.RevertContentStream();
This forces the SPFile to revert back to the site definition. Essentially this is what SharePoint Designer does when you click on
When I deploy to production, but I know I need to bump 2 of my JavaScript files to the latest site definition, I run this powershell.
PS D:\> $web = Get-SPWeb http://server
PS D:\> $file = $web.GetFile("Style Library/app/John/john1.js")
PS D:\> $file.CustomizedPageStatus
Uncustomized
PS D:\> $file.RevertContentStream()
PS D:\> $file = $web.GetFile("Style Library/app/John/john2.js")
PS D:\> $file.CustomizedPageStatus
Uncustomized
PS D:\> $file.RevertContentStream()
This works whether the file is Uncustomized (deployed via a previous package) or Customized (deployed manually or updated by a user). After the method is run, the file content will be the latest version that was in the deployed WSP package.
Try it out. Quite useful for fixing 1 JavaScript file in a package.


