Setting up Azure Service Bus for debugging SharePoint 2013 Workflows

If you follow the instructions on http://blogs.msdn.com/b/officeapps/archive/2013/03/21/update-to-debugging-sharepoint-2013-remote-events-using-visual-studio-2012.aspx to set up an Azure Service Bus to debug your SharePoint 2013 you need to take careful note of this starting paragraph.

Update 9/19/2014: Please note Microsoft Azure Service Bus now supports two types of connection strings: SAS and ACS. For remote event debugging via Azure Service Bus, only ACS connection string is currently supported as shown below. Follow the instructions in Service Bus Authentication and Authorization to get an ACS connection string for any new Service Bus namespace created after August 2014.

I skim read, so I missed it, twice.  And then spent a lot of time digging through why my brand new Azure Service Bus (SAS) doesn't work with SharePoint 2013's debugging.

To redeem myself and me ranting at other people (for my own fault of ... not-reading).  I present the following:

The newbie picture guide on how to set up Azure Service Bus for Office 365


Go here: http://azure.microsoft.com/en-us/downloads/

Scroll down and install the command line tools.  I went with the Windows PowerShell option on the left.

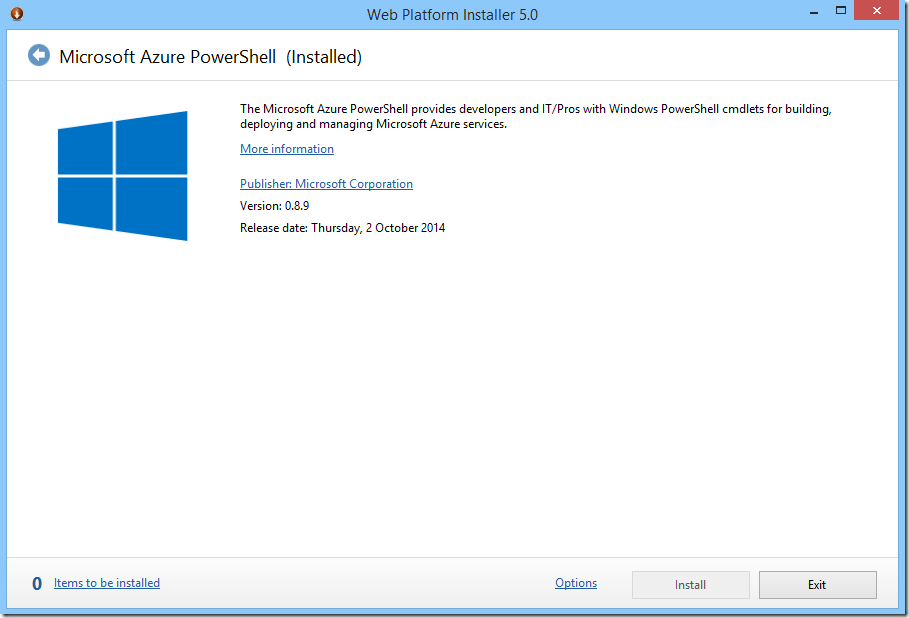
The download will run the Web Platform Installer, which then lets you install MS Azure PowerShell

image


Installed, it is here.

image


Run two PowerShell commands.

  • Add-AzureAccount will open a browser window, allowing you to sign in with your Office 365 account and download a policy file
  • New-AzureSBNamespace -name <name> -location '<region>' -CreateACSNamespace $true


image


The Service Bus can be managed via the web interface - they just can't be created.

It appears as type "Mixed"

image


Set Up VS.NET

This will now give you an old style ACS connection string that you can use in VS.NET's project properties.

image


And here is VS.NET happily debugging Office 365 workflow again.

image


For completeness: this is the Wrong Way, if you use the Azure Portal

image


Looks different.

image


ACS Connection String looks like this:

  • Endpoint=sb://debug-jl.servicebus.windows.net/;SharedSecretIssuer=owner;SharedSecretValue=<code>=

SAS Connection String looks like this:

  • Endpoint=sb://debug-bad.servicebus.windows.net/;SharedAccessKeyName=RootManageSharedAccessKey;SharedAccessKey=<code>=


The SAS Connection String does not currently work with VS.NET


Summary


  • Download Azure PowerShell (or Azure CLI via npm) - they are two different things, don't mix them.
  • Run two PowerShell commands to create the old Azure Service Bus (with ACS)
  • Thank Greg Hurlman@justcallme98 and ☞ Scott Hoag ☜@ciphertxt for reaching out and assisting me with my bad Azure skills.
  • Apologies to people that had to read my uneducated rant.  I retract all of it.
Demystifying SP2013 Workflow AppStep


A SharePoint 2013 workflow essentially can run as two different accounts.  The current user, or AppStep (which runs the action as the Workflow App account).

image

You will need to activate this feature.

But this is not where these notes end.


SP2013 AppStep is not the same as SP2010 Impersonation Step


In SP2010, when you use impersonation step, you gain additional activities, and because SP2010 doesn't have the concept of different permissions impersonations - essentially those activities lets you perform the action with elevated privileges in the code.


In SP2013, everything is an App.  That includes workflows.  So, when you activate this feature, you gain:

  • Ability to have App Step in your workflow designer (SharePoint Designer or Visual Studio .NET)
  • App Step runs the actions inside with App Permissions, and this is important: the App only has Read and Write.  It does not have full control or manage or any other fancy pants abilities.
  • When App Step updates the list item, you get a nice message on the list item that says Updated by Workflow on behalf of (user).

image


The power of HttpSend


You can of course call all the fancy new SP2013 REST API in your workflow.  http://msdn.microsoft.com/en-us/library/office/dn268594(v=office.15).aspx  - This gives your workflow a lot of power.  You can do this either as the current user or in the App account context.

image


Fabian and Chris has documented a number of really great articles on this.

Andrew Connell also has a great segment on Plural Sight on REST services.


There are ways to increase that permission level


If you are on-premises, there is a powershell command to grant the Workflow App account additional permissions.

Set-SPAppPrincipalPermission


If you are on Office 365, there is a hidden URL that lets you re-apply a permission mask to the Workflow Account.

/_layouts/15/appinv.aspx


Apps for SharePoint

Of course, the way Microsoft wants you to build workflows in the cloud would not be via a hidden URL.

The best way (but somewhat tricky at the moment, as tooling gets better this story will improve) is to build SP2013 workflows within an App for SharePoint.  The workflow is deployed in the App web, and has the same permissions that the user grants to the App web.  You can request additional permissions as you package your App and those will be available to the Workflow as well.

So this is fantastic for building self contained apps where lists, list definitions, javascript forms and SP2013 Workflows all tie together to form a small bit of functionality.

But having workflows in the App Web means that it can't be added to existing document libraries or lists or sites in the host web.  So there are a number of scenarios where Apps for SharePoint doesn't work that well.  I have been using SP2013's Sandbox Solutions for this purpose.  But Sandbox Solution Packages doesn't have its own App permissions (and thus you'll need to see the previous point about how to elevate that afterwards).


Integrated Workflow Apps

Microsoft has begun to talk about the new Integrated Workflow Apps in more detail.

The new syntax available for Integrated Workflow Apps will basically allow you to install workflow packaged as an App for SharePoint, but instead of deploying the Workflow to the App web, it will be deployed and made available on the Host Web. 

But tooling will need to improve in a future VS.NET update.  This is something I want to blog again later as more details are available.  But for now, there's a great link here.

There are a few pieces of the puzzle missing, and one may need to build additional javascript based UI to deploy assets (lists and workflow associations) to the host web.  But I'm loving the choices and I think SP2013 Workflows is moving in a fantastic direction.

SP2013 Workflows and WSPublishState does not exist

Column 'WSPublishState' does not exist. It may have been deleted by another user.

This is a quick blog of something that troubled me for nearly an afternoon.

Scenario

  • SP2013 workflow
  • Packaged as Sandbox Solution with list definitions in Visual Studio


The errors happen during Feature activation.  Both from within Visual Studio's Deploy as well as via Site Settings - Activate Feature.  The feature activation fails because WSPublishState column doesn't exist.


Resolution


I fixed this by splitting the list definition and workflow definitions into different features.  This leads me to ponder if there is a conflict caused by the list, workflow and workflow association being created all within the same feature.

Using SharePoint Designer 2013 Workflow to copy file via REST on Office 365

This is a bit of trial and error, but works very well at the end, so I want to publish this and share the syntax.


Related References:


I will tackle the next step.  How do you call a POST REST service, with the CopyTo function on SPFile.  http://msdn.microsoft.com/en-us/library/ms455020.aspx

The flexibility is that you can easily tweak the urls and essentially allow your workflow to copy files anywhere.


Step 1.  Understand the correct URL


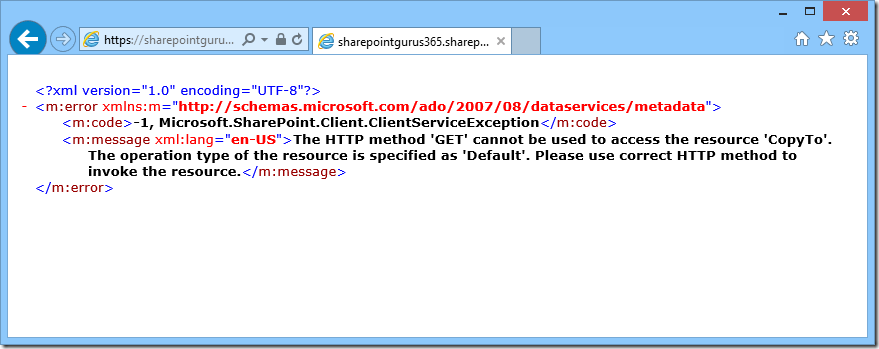
Put this into your browser's address bar (this executes a GET request):

image

No good.  Need POST.


Step 2.  Make that SharePoint Designer 2013 Workflow


  1. First step, with the POST call, we need to add a Request Header for Accept: application/json; odata=verbose
    Put this in a dictionary variable.

    image
  2. Second step.  Call Web Service!
    image

    You need to set up Request Headers as well.  This has to be done via the Properties, since it's not a link that's shown.  Set this to the dictionary created in the previous step.
    This step is the same as mentioned in Adrian Fiechter's blog.

    image
  3. You should capture the ResponseContent, and add an additional action to log it to History
    The Stage ends.  Go to End of Workflow.

    image

  4. The whole thing, in 3 lines:

    image

Step 3.  Run it.


image

Here's me starting the workflow on the top1.png file.


image

The top1.png is copied to top2.png!  Interestingly, it's copied the Call Workflow "workflow status" column.  Both links (which is a lookup field) go to the same workflow.


image

This is the workflow history. 

Notice that the CopyTo method returned void (null) in this case.  Should there be an error, you'll see it logged here.


That's all!  Hope you find these steps useful.