InfoPath - Form stuck on Installing, Upgrading or Deleting

When you publish an InfoPath Form through Central Administration, a few things happen:

  1. Central Administration creates a WSP package for this form.
  2. Central Administration creates timer jobs to deploy the package to each of the web applications that uses this form (defined by Activate to Site Collection, in Central Administration)
  3. Administration Service on each server then runs the timer job to deploy the form.
  4. The deployment job actually does a bunch of things:
    1. Creates a list of upgrade templates in \14\TEMPLATE\FEATURES\FT-01-72d7f7bc-0c6e-ba52-fa91-bb24c0014ed6
      Note, for some sites, this list is incredibly long, and can take a long time. I can't think of any good reason why we need all the versions, but may be this can potentially affect form upgrades.
    2. Creates a content type for the form
    3. Copy the form template to %site collection%/Form Templates/template.xsn
    4. (do other stuff)

Review this article from Microsoft: http://blogs.msdn.com/b/infopath/archive/2006/10/23/behind-the-scenes-of-administrator-approved-form-templates.aspx 

So when a form is stuck on "Installing" or "Upgrading"


  1. Check timer jobs. If there are jobs that can't start - they will wait
    1. Check all administration service are running on both servers
    2. Check timer service is running (timer service calls administration service to deploy)
  2. If your administration service is OFF, then you can try using the command line to execute those timer jobs
    1. stsadm -o execadmsvcjobs
    2. The benefit is if there's exceptions thrown here you'd see it in the console
    3. Do this on all SharePoint servers. If the administration service is running, then this stsadm command won't do anything.
  3. If your job is missing, you can check in Solution Management /_admin/Solutions.aspx
    1. Go to Solution Management under Central Administration /_admin/Solutions.aspx
    2. Find the farm solutions that for the form. The name would be form-formname.wsp.
    3. If the solution isn't deployed, you can select deploy - global
    4. If your admin service isn't running, you'll get a warning saying that jobs are scheduled but no admin service means they won't run.
    5. Use stsadm -o execadmsvcjobs
  4. If nothing else works, or if we want to do a complete removal.
    1. In form templates, select the form template, and hit Remove.

Form is stuck on "Deleting"

  1. Go to Solution Management under Central Administration /_admin/Solutions.aspx
  2. Find the farm solutions that for the form. The name would be form-formname.wsp.
  3. If the status is Deployed, then retraction hasn't started.
  4. Click the package and select Retract Solution.
  5. If your admin service isn't running, you'll get a warning saying that job is scheduled but no admin service means they won't run.
  6. In command line, stsadm -o execadmsvcjobs, on both servers.
    C:\ > stsadm -o execadmsvcjobs
    Executing job-application-server-admin-service.
    Executing job-password-management.
    Executing solution-deployment-form-tradepackageform.wsp-0.
    Operation completed successfully.
  7. You'll see this back on solutions.
  8. Name:    form-packageform.wsp
    Type:    Core Solution
    Contains Web Application Resource:    No
    Contains Global Assembly:    No
    Contains Code Access Security Policy:    No
    Deployment Server Type:    Front-end Web server
    Deployment Status:    Deployed
    Deployed To:    Globally deployed.
    Last Operation Result:    The solution was successfully retracted.
    Last Operation Details:   
    SRV02 : The solution was successfully retracted.
    SRV03 : The solution was successfully retracted.
    Last Operation Time:    1/8/2013 11:01 AM
  9. You can then remove the solution package.
  10. If you go back to Form Template management, the form will be removed from the list, and you can re-upload as usual.

InfoPath form load rules and loading event order


A strange gotcha in InfoPath concerning which event runs first.

  • Create an InfoPath form, with a field.
  • Create a Form Load rule, that sets this field to 1.
  • Add code behind, and create a Form_Loading event, that sets the same field to 2.


In InfoPath rich client form / debugging

  • The result number is 2

In InfoPath browser form

  • The result number is 1


Keep this order in mind if you use both Form Load rules as well as Form_Loading event.

InfoPath 2013 uses new Online Pictures instead of Clip Art


The InfoPath 2013 Preview doesn't really have many new features.  But this one little one made me smile.

image

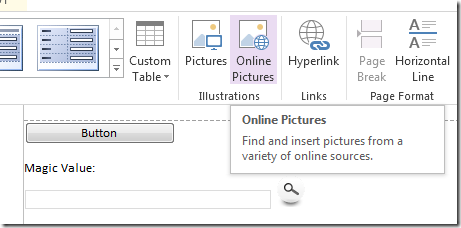
In InfoPath 2013, the Clip Art ribbon is replaced with Online Pictures.

image

For those of you wondering what was there before, in InfoPath 2010 it looked like this.  Yes it's that little button that we never used.

This dialog appears when you click it.

image


Searching for a victim's face...

image


image


A few things would make this even more awesome:

  • Add my commonly used Clip Arts to my skydrive, and link it up.  This probably works already, except my Office 2013 Preview isn't hooked up to my normal Microsoft Account.
  • Allow additional websites, I find iconfinder.com to be extremely good.
  • Or allow URL to be used directly in the dialog.

InfoPath - creating a custom FormServer page to embed your own JavaScript goodness


From time to time, people ask about how to embed JavaScript within InfoPath - there are all kinds of reasons why you'd want to do this, and in this example, I'll focus on a previous use case (Disabling backspace key in InfoPath browser form) that I've discussed - to disable the backspace key when you don't have a textbox selected - so that the user isn't dumped back to the previous page in Internet Explorer - a terribly woeful user experience.

Steps

  1. Create a SharePoint solution in VS.NET
  2. Add mapping for Layouts
  3. Copy contents from the OOTB FormServer.aspx file to our custom aspx page
  4. Deploy to see how it works
  5. Add our own, additional JavaScript


1. Creating a VS.NET SharePoint Project


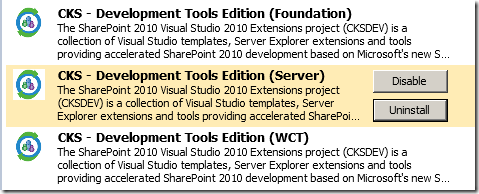
The key point here is that you will need the CKS extensions for VS.NET 2010.  Grab them first from Extension Manager.

image

Because we are going to build an application page that is deployed into SharePoint Root, this project has to be a farm solution.

image


2. Map to _layouts in your SharePoint solution

image

image


3. Add our custom aspx page

image

You may get an security warning from VS.NET to trust CKS - allow this.

The Basic Site Page is the simplest page that can be added to a SharePoint solution.  It is essentially one ASPX page without any code behind.  In this example this page is sufficient for our needs.


At this point, we should go visit our own SharePoint root and see how the default FormServer.aspx page is built.

Navigate to: C:\Program Files\Common Files\Microsoft Shared\Web Server Extensions\14\TEMPLATE\LAYOUTS\

And look for FormServer.aspx

You'll see that the page is actually really simple - all the hard work is in the XmlFormView control.  The page passes query parameters to the XmlFormView control.

Copy all the content of this out of the box FormServer.aspx file

Return to our project, and paste all the contents over the sample JLFormServer.aspx file.  Now, your JLFormServer.aspx file should be exactly the same as the out of the box FormServer.aspx file.

image


4. Deploy to see how it works

Package and deploy the solution to SharePoint - you'll see this deployed to SharePoint root.

image


Take a normal form server url:

http://spg-dev-jl/_layouts/FormServer.aspx?XsnLocation=~site/Forms/Forms/template.xsn&DefaultItemOpen=1

Change it to our custom aspx page:

http://spg-dev-jl/_layouts/JLFormServer/JLFormServer.aspx?XsnLocation=~site/Forms/Forms/template.xsn&DefaultItemOpen=1

image


Hey works fine :-)


5. Adding our own JavaScript goodness

Go back to our JSFormServer.aspx page, and look for the <head> element.  Let's add some JavaScript.

<script src="http://ajax.aspnetcdn.com/ajax/jQuery/jquery-1.7.2.min.js"></script>
<script>
    function document_keydown(e) {

         if (e.keyCode == 8){

            var t = e.target;
            if (t) {
                if (t.tagName == "INPUT") return; // ignore textbox
                if (t.tagName == "TEXTAREA") return; // ignore multi-line textbox
            }
            if ($(t).hasClass("ms-inputuserfield")) {
                return; // ignore people picker, by checking for ms-inputuserfield css class
            }

            // letting us know we've ate a backspace key 
            alert('Ate a backspace key, hew!', false);

            // cancel backspace navigation
            e.preventDefault();
            e.stopImmediatePropagation();
            return false;
        }
    };

    $(document).keydown(document_keydown);
</script>

Package everything and deploy to server.


Result: everything in action!


Navigate to our custom form server page again.

http://spg-dev-jl/_layouts/JLFormServer/JLFormServer.aspx?XsnLocation=~site/Forms/Forms/template.xsn&DefaultItemOpen=1

Select a textbox and delete a few characters - this should work fine, as the JavaScript function allows this.

Un-focus from a textbox, so that the focus is now on the main page - and press backspace.  Normally, this would trigger Internet Explorer to go back to the previous page in history, but now this event is caught by our JavaScript and cancelled!

image


Note

Finally, comment out the alert in your JavaScript - I'm sure you don't want to drive your users crazy.

// letting us know we've ate a backspace key
// alert('Ate a backspace key, hew!');


Summary

  • We looked at how to build and deploy a simple site page to SharePoint root
  • What a FormServer.aspx page looks like
  • How we can add additional JavaScript to our Custom FormServer.aspx page


Update

  • Updated the javascript function that includes my latest tweaks for multiline textbox and people picker

InfoPath 2010 - query using the REST interface


This is an exercise to play with the REST interface, which works extremely well with InfoPath 2010.

Scenario

  1. We have a postcode list.  Filled with post codes and suburbs.
  2. In InfoPath, we want to select a post code and populate the corresponding data from the list.
  3. While this is possible using the old owssvr.dll trick, Let's do this one with the REST interface - which is a much cleaner example.


Steps

  1. Here's a very simple custom list, "Postcodes"
    image
  2. The REST interface to select a row, using a filter:
    http://spg-dev-jl/_vti_bin/listdata.svc/Postcodes?$filter=Code eq '2000'
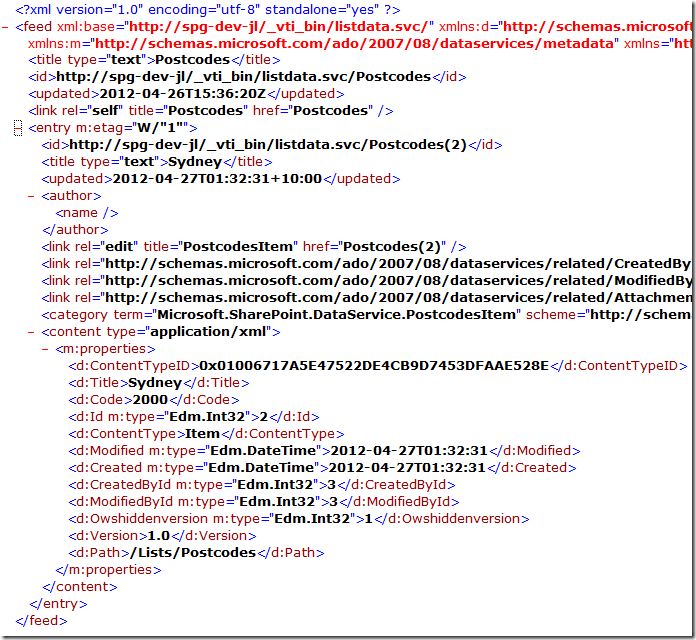
  3. This returns the following XML - you can see Title and Code in the XML
    image
  4. Create an InfoPath 2010 form, create a few fields:  "Postcode" (number) and "Suburb" (text, shown as expression)
    image
    image
  5. Create a secondary data source and connect to the earlier REST service.
    image
  6. Add an action to Postcode - on change, set the REST URL, then execute the query.
    image
    The Change REST URL action appears when you have REST secondary data sources in your 2010 form.

    We want to change the URL based on a formula, so set it to:
    concat("http://spg-dev-jl/_vti_bin/listdata.svc/Postcodes?$filter=Code%20eq%20'", . ,"'")

    image
    image
  7. Finally, copy the new suburb back into our Suburb field from the updated secondary data source.
    image

    image

  8. The completed rule(s)
    image


Result

Running in InfoPath rich client

image

Running in Form Server

image


Summary

  • The REST data source is actually a FileQueryConnection and expects an XML result.  In InfoPath 2010 though, we have the new action to "change" the path using rules which is really the unsung hero of this story.
  • And thus we got to play with REST and InfoPath 2010


Download

https://static1.squarespace.com/static/5527bff2e4b0b430660b0d10/5527c30de4b030eeeef09715/5527c30fe4b030eeeef09eff/1335456086383/RestPostcodesForm.xsn