InfoPath - check leap year using expression


This is a fun one.

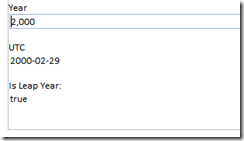
  1. Use the undocumented msxsl:utc function, which checks / converts a date into a normalized representation.

    image

  2. So, what will happen if I test it with with a garbage date, say, the 29th of February of 2001, which isn't a leap year?

    image
  3. So just check if the result of the utc function returns empty string or not.

Expression

msxsl:utc(concat(my:year, "-02-29")) != ""

InfoPath - removing newline (CRLF) using rules


  1. In InfoPath (and in Windows in general), a newline is two characters \r\n (carriage return, followed by a newline character).
  2. You can't easily use \r or \n within InfoPath rules, since the XML is escaped into \\r and \\n defeating your intention.
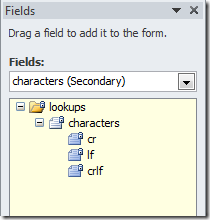
  3. First, add a characters secondary data source: Add an external XML file for characters
    You should get this secondary data source with the special characters we need.
    image
  4. On the field that you want to remove newlines, add a changed rule:
    image

    The translate rule is:
    translate(., @crlf, "")
    or expanded xpath:
    translate(., xdXDocument:GetDOM("characters")/lookups/characters/@crlf, "")

    use select field and change the datasource to characters.
  5. To prevent this rule from running into infinite loop, set a condition:

    image

    The expression is:
    contains(., xdXDocument:GetDOM("characters")/lookups/characters/@crlf)
  6. Result:
    image 

Test it!


image
Test typing something with newline

image
Rule runs and removes any new line characters

InfoPath - Concat SharePoint list with the Eval function (aka Voodoo)


It really can't hurt to play with the crazy XPath capabilities within InfoPath.  This is documented in many places, starting:

http://blogs.msdn.com/b/infopath/archive/2006/04/05/569338.aspx

Which offered possibly the best explanation of how this technique with Eval() actually works.  I prefer to remembered this as PURE VOODOO.


1. Create our SharePoint list

image


2. Create a secondary data connection to the list

image

image


3. Drag the dataFields section into the form, to create a common binding parent

image

This step makes step 4 a lot easier, since the Eval loop is relative and works on the repeating section inside the dataFields section.


4. Add expression box within this Section

image

The Expression is:
xdMath:Eval(xdMath:Eval(d:SharePointListItem_RW, 'concat(d:Title, ":")'), "..")


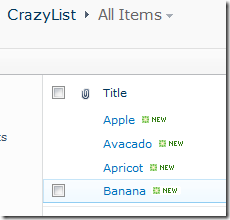
5. Result:

image

InfoPath - managing lots of tooltip in your browser form

This is an idea that I've been brooding for a long time.  Finally got a prototype implemented.


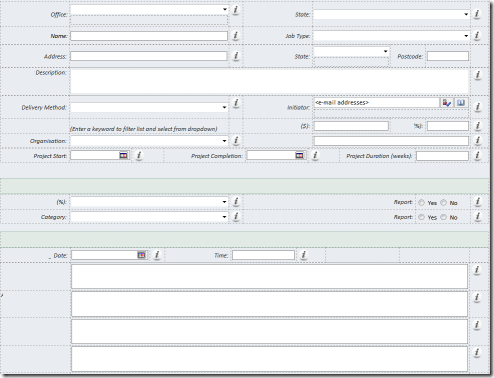
We have a complicated looking InfoPath form.  We've always wanted to have lots of help (i) tooltips.  The picture below alone has 24 information tips.
image


The original plan is to use an Picture button, set the image to the image resource (so that they all share the same resource), and manually add tooltips to each button.

image

This approach works OK, but is very tedious.  Each one of our views are massive, and we have about 10 of them.  Some fields re-appear on different views and need to have the same tooltip.  This is also not very manageable - we can't modify the tooltip easily without republishing the InfoPath form.


An idea begin brewing by combining an external XML file along with the Rich HTML control, something that I've experimented recently.

/blog/2011/5/30/infopath-2010-embed-html-for-rich-and-web-forms.html
/blog/2011/10/12/infopath-an-example-of-using-an-xml-file-for-special-charact.html


Idea!

  1. Produce an XML file that has all our tooltips.
  2. Store this file in SharePoint
  3. In InfoPath, connect to this XML file as an external datasource, always load it from server
  4. Bind the XML fields to Rich HTML controls


1. My tooltip XML file. 

My XML file, with 2 entries in it for "office" and "state". 

Note the content of the two entries is essentially a HTML IMG tag.  With the source pointing to an image stored in SharePoint, and a tooltip.

<?xml version="1.0" encoding="utf-8"?>
<html>
  <office>
   <img xmlns="http://www.w3.org/1999/xhtml" src="/Style Library/Images/info.png" border="0" title="Select the Office that will administer this project" />
  </office>
  <state>
    <img xmlns="http://www.w3.org/1999/xhtml" src="/Style Library/Images/info.png" border="0" title="Select the State that this project will report to" />
  </state>
</html>


2. Store this file in SharePoint

I store this in SharePoint, on /Style Library/html-tooltip.xml.

image


3. Add secondary data source in InfoPath

Add XML datasource.

image

Select "Access the data from specified location"

image

Always retrieve data

image

Result data connection

image


4. Bind to Rich HTML controls

Switch to the secondary data source in the Fields tool pane.
Drag my new entry for "State" with the right click contextual menu.
Select Rich Text Box

image


There's quite a bit of clean up to do:
image

  • Remove the label
  • Set the background shade to No Fill
  • Set border to 1px solid white - you must keep 1px border, otherwise when you hover over the picture the Rich Text box will shift as InfoPath adds a focus to the box.
  • Set the height and width to 25px (size of my images).
  • Select Read-Only in the ribbon
    image
  • The result:
    image


Extra Note

You must show the web form Ribbon, otherwise the Rich Text is rendered differently in an iFrame, and the IMG tooltip won't show up.  Sorry, this behaviour is so weird, I do have an ugly workaround but I won't publish it - really ugly.

image


See it in action:

image


And if you need to change the text, open up the XML file in SharePoint designer, change it, and save the XML file again.

image

image


Summary

  • A technique to use one XML file in SharePoint to specify many HTML tooltip elements to be used within an InfoPath form
  • This allows tooltips to be updated independently of templates, and multiple elements in the InfoPath form can share and reuse the same tooltip
InfoPath - packaging site columns and content types

WARNING

I do not recommend packaging and deploying content types.  Site columns are fine, but it is best to leave InfoPath content type to SharePoint - since it does quite a few other things during self provisioning and deployment.

WARNING - you have been warned.


A discussion popped up on the InfoPath forums and I took a good stab at it.

http://social.technet.microsoft.com/Forums/en-US/sharepoint2010customization/thread/d2982a7c-86e1-4868-864b-2fcea68274fd/

Jason Li 

Content Deployment between different environments (InfoPath, SharePoint Designer Workflow, Content Type) in SharePoint 2010
I have read many discussions on this (or similar topic) and still would like to post this again to see if I can get real answers:

  1. I have InfoPath forms.
  2. These forms are published as content types. 
  3. I have reusable SharePoint Designer workflows.  
  4. I have document libraries created to use these content types.
  5. I have security groups.

How do I move these things from DEV to TEST, UAT all the way into PROD. 

As to #3:  GUID is driving me crazy.


Content Type deployment across different farms

The only way I have ever got all the environments to obey my command regarding content types is to use Solution Packages.

  1. Create InfoPath form in DEV, when publishing, use Content Type, and Site Columns.
  2. Once the Content Type and Site Columns are created, package them into a WSP.  From now on, always deploy content type and site columns using WSP.  This forces All the GUIDS to be identical across all farms, which makes everything work nice.  (see below for steps and pictures).
  3. Reusable SharePoint designer workflows can be tied to these content type / site columns, so can document library.
  4. Deploy package to TEST, you can create document libraries with feature as well, or configure them manually.  I deploy InfoPath forms to TEST by publishing from InfoPath to the TEST environment, depending on whether you are doing:
    • Site content type: publish to the destination list - it should automatically pick up the content type since the GUID are the same.  Site columns will match too.
    • Central admin forms - deploy via central admin, this places the form template back in /FormServerTemplates/ on the root site, hook this back using Content Type / advanced / form template in each list.

InfoPath forms always have data connections (since InfoPath can't do anything), you should convert all data connections to connection files hosted relatively on each DEV, TEST, etc. environment, this way you don't need to modify the form template, and depending which environment it's published to, it'll go and find the right sets of data.


Packaging InfoPath Content Type and Site Columns


Packaging site columns and content types are a lot easier now in SharePoint 2010 with VS.NET 2010. 

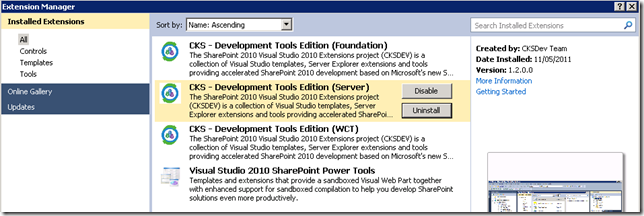
Grab CKS extension first.
image

  1. Create an empty SharePoint project on the DEV server.  I've always used Farm Solutions but there's probably no harm trying Sandbox Solutions.
  2. In the Server Explorer, navigate to your SharePoint DEV site.  Expand the nodes and find your Content Type under the root web.  Select Import Content Type to bring this definition into your SharePoint project.

    image
  3. This will import the content type under a feature with a default name Feature 1.  Rename the feature (VS.NET will fix all the related names).

    image
  4. Open the feature and fix the Title as well.  Notice that this feature is Web scoped.

    image
  5. Next, navigate in the Server Explorer to the site columns, and bring in the Site columns that was promoted from InfoPath.

    image
  6. This brings in two additional elements with pretty ugly GUID-names.  Need to tidy this up.

    image
  7. Open the Elements.xml file under the two site columns, and copy the <Field... /> definitions.
    Open the Elements.xml file under the InfoPath content type, and insert the site column definitions above the content type definition.

    (You'll see the content type has FieldRef to the exported columns).

    image
  8. Build the project into a package

    image
  9. Ta-da!

    image