Taking a picture with PowerApps and sending to SharePoint with help of Azure Functions

Taking a picture with PowerApps and sending to SharePoint with help of Azure Functions

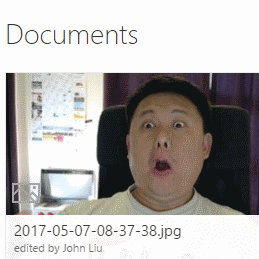
Sometimes, after having written a selfie app in Silverlight, JavaScript, even an Add-in (SharePoint Online), you want to do it again with PowerApps.  This is that article.  I think it's really fun.  And I think it's funny I'm solving the world's problems one AzureFunction at a time.  And I think I need help.

Read More

April PnP JavaScript special interest group call and Azure Functions demos

Shortly after the March Azure Functions demo, I reached out and asked Patrick about coming back to do a follow up focused on JavaScript - specifically PnP-JS-Core.  As I've completely skipped it in the March call/demo that was focused on PnP PowerShell (and C#).  When I first started playing with Azure Functions I was doing everything in JavaScript - so it was nice to return to be able to do this demo. 

Uploaded by SharePoint / Office 365 Dev Patterns & Practices on 2017-04-13.

I'm a bit more mindful of the time, but this whole demo is on PnP-JS-Core.

We focused on a few things that people asked in the PnP-PowerShell call in March:

  • What about JavaScript - can you show JavaScript in Azure Functions
  • Isomorphic PnP-JS-Core - running on NodeJS - if you are going to use JavaScript on the client, might as well use the same code on the server.
  • Authentication using Sergei's node-sp-auth (congrats on MVP award!)
  • How to test your Azure Functions locally via azure-functions-cli
  • Live debugging with VSCode (locally)
  • How to pack your JavasScript AzureFunctions so that you don't need to deploy the massive node_modules (which is both costly for storage, and has a higher startup time).  We use azure-functions-pack

SharePoint's Future is full of JavaScript

Lots of quick little demos that makes a nice introduction scenario - but if you have not seen Azure Functions before, this is best viewed as a supplementary follow up to the first PnP Call in March.

Related Links

http://johnliu.net/blog/2017/4/march-pnp-special-interest-group-call-and-azure-functions-demos


March PnP special interest group call and Azure Functions demos

On March 22, I put my hand up to do demos for the Office Patterns and Practices Special Interest Group conference call.  We talked about Azure Functions with PnP, and Bert talked about a new Modern Page scanner that can be used to check if sites have customizations that would make migrating to modern pages difficult.

PnP Core, PowerShell and Provisioning Engine SIG recording from March 22nd, 2017. Details around the covered content and direct links to demo section from TBD

I had a lot of fun.  It probably was very obvious I was laughing most of the way.  This is a follow up post of various things that I had noted down but unsaid.

Demo files

All my Functions in the demo are published to: https://github.com/johnnliu/azure-functions-o365 

That Get-AccessToken typo

It turns out the problem is the dash - character that I copied from GitHub.  If I retrype the command as - (dash) then the cmdlet is fine.

Costs

Vesa mentioned this at the end.  Azure Function's pricing is very cheap.  It is actually because Functions don't run on VMs provisioned for you.  Azure finds an unused VM, copy your function on it, then run it, and then delete it.  The free monthly compute bucket is 400,000 Gb/s.  If you exceed the limit it is still dirt cheap.  I'm serious about the fact that I have turned off all my VMs, I only run Functions.

Also, I'm just as shocked as you are that Vesa seems to know exactly what I'm about to present next.

Docker

My platform as a service goes up.  I see Docker as going downwards and not the direction I want to go.  Functions as a Serverless platform needs to be above Web Server as a platform.  They could all live on top of Docker, but that's an implementation detail that I don't need to care about.

Configure Inputs and Outputs

Because Functions are serverless, it is important to understand that you don't really want to even write your own code for handling output.  If you want to write to Blob Storage or Azure Queue - there are output configuration you can set up.  Then the output from the function is written directly to those sources without you having to write bare minimum code.

Configuring Inputs also allows you to switch from a HttpTrigger to a TimerTrigger, if you need that.

Flow to Azure Functions

If you feel uncomfortable with having an open public URL exposed - you can have Flow upload a JSON directly to an Azure Queue, then execute the Azure Function from the queue.  This also provides automatic-retries.

Future announcement - PnP SIG JS Call

I've done a bit more work with pnp-js-core, azure-functions-cli and azure-functions-pack.  And have put up my hands to Patrick to do a PnP-JS-Core SIG call in the future.  Need a few pieces to sort out first.

Azure Functions has a very definite place with NodeJS as well.  We'll explore that hopefully soon.
O365 Customizations in the year 2017

It is the year 2017 - watch out, because O365 customizations are full speed ahead.

This is a MS Australia Ignite 'lightning talk' for Meetup Madness (sorry, I took twice the amount of time than I should) to convince a room full of people that loved O365 to become developers.

MS AU Ignite Meetup Madness - O365 Customizations in 2017

Much laughter was had.  But I stand by what I said - you are now all developers, now go build something amazing!


AzureFunctions, PowerShell, MS Graph and AppOnly permission

In a previous blog post, I wrote about connecting to Microsoft Graph with Resource Owner grant.

That particular authentication scheme is for delegate permissions.  So the function, utilizing an account's username/password, is performing actions as that user.

I'm revisiting that post today and instead talk about App-Only Permissions, and the steps are very similar, and to some may be easier.


Register App-Only

Head into the New Azure Portal.

Add "Read and write all groups" permission under "Application Permissions"

You should see this:

"1 Application Permission"

Hit the Grant Permission button here.

And set up a Client Secret

Nearly there, one more step we need to make the registered app allow implicit flow.

Hit the Manifest button, change oauth2AllowEmplicitFlow property to true, hit save.

Copy the Application ID - this is the Client ID.

On the first page of Azure AD properties, grab the Directory ID


You now have:

  • Directory ID (Tenant ID)
  • Application ID (Client ID)
  • Key (Client Secret)
  • And consent for your app has been granted.


PowerShell Code


$tenant_id = "26e65220-5561-46ef-9783-ce5f20489241";
$client_id = "44da3f20-fc0b-4f90-8bb1-54b1d50e3ecf";
$client_secret = $env:CS2;
$resource = "https://graph.microsoft.com";

$authority = "https://login.microsoftonline.com/$tenant_id";
$tokenEndpointUri = "$authority/oauth2/token";
$content = "grant_type=client_credentials&client_id=$client_id
            &client_secret=$client_secret&resource=$resource";

$response = Invoke-WebRequest `
    -Uri $tokenEndpointUri `
    -Body $content `
    -Method Post `
    -UseBasicParsing


The small difference between this time and the previous blog is now we are using AppOnly permissions.  The grant_type is client_credentials.  And you don't need to supply username/password.  The clientid/clientsecret pair is sufficient.


The whole thing

$name = "group-name-here"

$client_id = "44da3f20-fc0b-4f90-8bb1-54b1d50e3ecf";
$client_secret = $env:CS2;
$tenant_id = "26e65220-5561-46ef-9783-ce5f20489241";
$resource = "https://graph.microsoft.com";

$authority = "https://login.microsoftonline.com/$tenant_id";
$tokenEndpointUri = "$authority/oauth2/token";
$content = "grant_type=client_credentials&client_id=$client_id&client_secret=$client_secret&resource=$resource";

$response = Invoke-WebRequest -Uri $tokenEndpointUri -Body $content -Method Post -UseBasicParsing
$responseBody = $response.Content | ConvertFrom-JSON
$responseBody
$access_token = $responseBody.access_token

# GET https://graph.microsoft.io/en-us/docs/api-reference/v1.0/api/group_list
# $body = Invoke-RestMethod -Uri "https://graph.microsoft.com/v1.0/groups" -Headers @{"Authorization" = "Bearer $access_token"}
# $body | ConvertTo-JSON

# POST - this creates groups https://graph.microsoft.io/en-us/docs/api-reference/v1.0/api/group_post_groups
$body = @{"displayName"= $name; "mailEnabled"=$false; "groupTypes"=@("Unified"); "securityEnabled"=$false; "mailNickname"=$name } | ConvertTo-Json 
$body = Invoke-RestMethod `
    -Uri "https://graph.microsoft.com/v1.0/groups" `
    -Headers @{"Authorization" = "Bearer $access_token"} `
    -Body $body `
    -ContentType "application/json" `
    -Method POST
$body | ConvertTo-JSON

There are no other dependencies - authenticate and calling MS Graph is really that simple - two web requests!


The default "Owner"

Usually, the user that created the group becomes the Owner of the group.

In the Delegate Permission example in the last blog, the group is created with my user account and I'm the owner.

In the Application-Only Permission example in this blog, the group is created with the app account and there is no user owner!