All Demo Downloads will be on Github - blog housekeeping

I've taken a short break from writing blog posts - I haven't been idle, I have been writing something.  Hopefully to be able to share it with everyone soon.  Anticipation is killing me.

As we roll into a new month September!  There are a few planned updates I'm doing for the rest of the year...

  1. Several old blog posts that was in Draft will be merged and published.  These are summary posts from the Office 365 Saturday events I've been going to.
  2. I've been in several SharePoint Sydney user group sessions and that needs summaries too.
  3. SPFx is announced, and now Developer Preview.  Posts there too.
  4. I'm looking around to see what's the best way to record some video sessions as I retire them to the archives.

First big announcement.

All future demo downloads will be on Github!

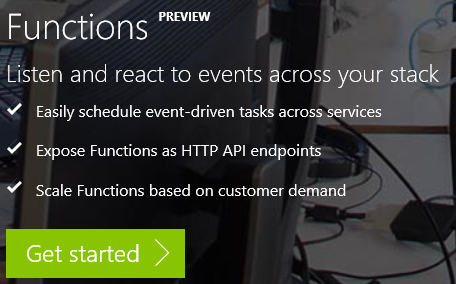
The download files for my demos on Upskill Your Javascript - from building JS WebParts for SharePoint to Office Add-ins and Azure Functions is up first.

https://github.com/johnnliu/demo-upgrade-your-js

The main driver for this is that the files are updated overtime, and Github really provides a much better place for me to point people to and say the latest files are over here.  Check it out, and if you have Issues - tag them directly on the lines.

So that's the first of the big news.

Seems obvious now...

Seems obvious now...


Azure Functions, JS and App-Only Updates to SharePoint Online

Have you ever, really wanted to have your JavaScript perform a RunWithElevatedPrivileges against SharePoint Online?  Do something that the current user just don't have permission to do?

Today we tackle this core problem that every SharePoint JavaScript developer has thought about at least once.  And we will do it with AzureFunctions.

1.  Register Azure Active Directory App

You can go through dev.office.com to get started - but you'll need various bits of the portal.  So do this from old portal https://manage.windowsazure.com

You need to write copy out your Client ID and Client Secret

Lets give this some App-Only Permissions

Also need to allow implicit flow, that means download the manifest, change the json (below) and upload it back.


2.  Create Azure Function

Go to http://functions.azure.com and sign in. 

This picture looks like an ad in my blog...

This picture looks like an ad in my blog...

Create a new function - I choose the HttpTrigger with Node template.

2.1 Add NPM modules

NodeJS modules (= C# reference libraries) are loaded via npm install (= nuget).  To access this, you need to go to

Function app settings > Go to App Settings > Tools(tipped by @crandycodes)

npm install adal-node
npm install request

The errors are because I don't have a package.json file in the folder.  Add adal-node and also request.  Check they are here.

2.2 NodeJS code

Go back to the function and add this code

var request = require("request");
var adal = require("adal-node");

module.exports = function(context, req) {
    context.log('Node.js HTTP trigger function processed a request. RequestUri=%s', req.originalUrl);

    var authorityHostUrl = 'https://login.microsoftonline.com';
    var tenant = 'johnliu365.onmicrosoft.com';
    var authorityUrl = authorityHostUrl + '/' + tenant;
    var clientId = '37ded58a-YOUR-CLIENT-ID';
    var clientSecret = 'fE4kulPjYOUR-CLIENT-SECRET=';
    var resource = 'https://graph.microsoft.com';

    var authContext = new adal.AuthenticationContext(authorityUrl);

    authContext.acquireTokenWithClientCredentials(resource, clientId, clientSecret, function(err, tokenResponse) {
        if (err) {
            context.log('well that didn\'t work: ' + err.stack);
            context.done();
            return;
        }
        context.log(tokenResponse);

        var accesstoken = tokenResponse.accessToken;
        var options = { 
            method: 'GET', 
            uri: "https://graph.microsoft.com/beta/groups", 
            headers: { 
                'Accept': 'application/json;odata.metadata=full',
                'Authorization': 'Bearer ' + accesstoken
            }
        };

        context.log(options);
        request(options, function(error, res, body){
            context.log(error);
            context.log(body);
            context.res = { body: body || '' };
            context.done();
        });
    });
};

Run it

Got our auth token, and got our list of groups.  Perfect.

2.3 Call SharePoint Online

var request = require("request");
var adal = require("adal-node")

module.exports = function(context, req) {
    context.log('Node.js HTTP trigger function processed a request. RequestUri=%s', req.originalUrl);

    var authorityHostUrl = 'https://login.microsoftonline.com';
    var tenant = 'johnliu365.onmicrosoft.com';
    var authorityUrl = authorityHostUrl + '/' + tenant;
    var clientId = '37ded58a-YOUR-CLIENT-ID';
    var clientSecret = 'fE4kulYOUR-CLIENT-SECRET=';
    //var resource = 'https://graph.microsoft.com';
    var resource = 'https://johnliu365.sharepoint.com';

    var authContext = new adal.AuthenticationContext(authorityUrl);

    authContext.acquireTokenWithClientCredentials(resource, clientId, clientSecret, function(err, tokenResponse) {
        if (err) {
            context.log('well that didn\'t work: ' + err.stack);
            context.done();
            return;
        }
        context.log(tokenResponse);

        var accesstoken = tokenResponse.accessToken;
        /*
        var options = { 
            method: 'GET', 
            uri: "https://graph.microsoft.com/beta/groups", 
            headers: { 
                'Accept': 'application/json;odata.metadata=full',
                'Authorization': 'Bearer ' + accesstoken
            }
        };
        */
        var options = {
            method: "POST",
            uri: "https://johnliu365.sharepoint.com/_api/web/lists/getbytitle('Poked')/items",
            body: JSON.stringify({ '__metadata': { 'type': 'SP.Data.PokedListItem' }, 'Title': 'Test ' + (req.body.name || "hello!") }),
            headers: {
                'Authorization': 'Bearer ' + accesstoken, 
                'Accept': 'application/json; odata=verbose',
                'Content-Type': 'application/json; odata=verbose'
            }
        };


        context.log(options);
        request(options, function(error, res, body){
            context.log(error);
            context.log(body);
            context.res = { body: body || '' };
            context.done();
        });
    });
};

Changed resource to sharepoint.com, also changed the POST options - I want to insert a list item.

This is so sad!  "Unsupported app only token."  :-( :-(

1.1 Backtrack

To move on, we need to backtrack a bit.  @richdizz has a great blog post that documents this - to perform App Only operations on SharePoint Online, the client ID / Client Secret doesn't cut it.  You need to get auth token via certificate.

https://blogs.msdn.microsoft.com/richard_dizeregas_blog/2015/05/03/performing-app-only-operations-on-sharepoint-online-through-azure-ad/

Rich also pointed me to Travis Tidwell (Form.IO) 's excellent

https://github.com/formio/keycred

npm install -g keycred
keycred
(go through the options)

You need three things:

1. The generated keyCredentials JSON

You need to add this part to your AD App Manifest json file - under keyCredentials.  Your JSON should have a really long value for "value"

2. The private key

-----BEGIN RSA PRIVATE KEY-----
MIIEowIBAAKCAQEAveX4jNn/eBPM1kdRNMPAlh6rT/JFoah9QkUbeYPkYGqWvn7X
~~snipped~~
0ibMc7T5K7AGVT0q0ppBLheFQkeSnPbHJrX40xILEkzd/0RLvC8X
-----END RSA PRIVATE KEY-----

Copy the entire thing, including -----BEGIN and END ----- and save this into a file.  I called mine funky.pem
Upload the funky.pem file into the folder.  I use the VS Online tool.


3. Certificate Fingerprint:

85b82741408c6c3af462b3a378e3e8963efaad70

2.4 Update to acquireTokenWithClientCertificate

var request = require("request");
var adal = require("adal-node");
var fs = require("fs");

module.exports = function(context, req) {
    context.log('Node.js HTTP trigger function processed a request. RequestUri=%s', req.originalUrl);

    var authorityHostUrl = 'https://login.microsoftonline.com';
    var tenant = 'johnliu365.onmicrosoft.com';
    var authorityUrl = authorityHostUrl + '/' + tenant;
    var clientId = '37ded58a-YOUR-CLIENT-ID';
    var clientSecret = 'DONT NEED USE CERT';
    //var resource = 'https://graph.microsoft.com';
    var resource = 'https://johnliu365.sharepoint.com';

    var thumbprint = '85b82741408c6c3af462b3a378e3e8963efaad70';
    var certificate = fs.readFileSync(__dirname + '/funky.pem', { encoding : 'utf8'});

    var authContext = new adal.AuthenticationContext(authorityUrl);

    authContext.acquireTokenWithClientCertificate(resource, clientId, certificate, thumbprint, function(err, tokenResponse) {
    //authContext.acquireTokenWithClientCredentials(resource, clientId, clientSecret, function(err, tokenResponse) {
        if (err) {
            context.log('well that didn\'t work: ' + err.stack);
            context.done();
            return;
        }
        context.log(tokenResponse);

        var accesstoken = tokenResponse.accessToken;
        /*
        var options = { 
            method: 'GET', 
            uri: "https://graph.microsoft.com/beta/groups", 
            headers: { 
                'Accept': 'application/json;odata.metadata=full',
                'Authorization': 'Bearer ' + accesstoken
            }
        };
        */
        var options = {
            method: "POST",
            uri: "https://johnliu365.sharepoint.com/_api/web/lists/getbytitle('Poked')/items",
            body: JSON.stringify({ '__metadata': { 'type': 'SP.Data.PokedListItem' }, 'Title': 'Test ' + (req.body.name || "hello!") }),
            headers: {
                'Authorization': 'Bearer ' + accesstoken, 
                'Accept': 'application/json; odata=verbose',
                'Content-Type': 'application/json; odata=verbose'
            }
        };


        context.log(options);
        request(options, function(error, res, body){
            context.log(error);
            context.log(body);
            context.res = { body: body || '' };
            context.done();
        });
    });
};

Use fs.readFileSync to read funky.pem file and acquireTokenWithClientCertificate instead of ClientSecret

Result

Note - updated by "funky"

Triggers

There are several Azure Functions triggers that immediately jumps out at me as being really useful.

HTTP Trigger

Your JavaScript can call the azure function and trigger the action.  You will need to turn on CORS.  And filter to only your domain.

But this will give your client side javascript ability to call an elevated function.

Timer Jobs

You can trigger your function based on a timer.  In this scenario, your javascript will run against SharePoint like a timer job. 

WebHooks

Currently only Exchange in Office 365 supports WebHooks.  But SharePoint will support it in the future.  When this becomes available, a webhook can trigger an Azure Function and essentially, you have a List Item event receiver.

Except all in JavaScript.

So much fun haha I'm so excited!

Further Reading


UserCustomAction-ConfigPage adding CSS file links

I've had several questions in comments about how to add CSS files using the Simplest-Safest-Most-Future-Proof-Way to customize your SharePoint and SharePoint Online using UserCustomActionConfigPage

This is something I wanted to talk about from day 1 of this series - as I did cover you can add more than 1 CSS files, and specify their ranking via the Sequence number.

Because UserCustomAction doesn't create a link for CSS references, the way to do this is via the ScriptBlock and create a LINK element and attach it on page creation.

How to use this?

Grab the latest configure-page.aspx from Github.

Reference a CSS file instead of a JS file.  The ID is optional, but will be respected if specified.

The Sequence is honoured - 1001 will follow 1000.

Result - the CSS reference is loaded into the page.

Happy branding!


SP2013/2016 Responsive-UI and UserCustomActionsConfigPage

I just pushed an update to my Simplest-Safest-Most-Future-Proof-Way to customize your SharePoint and SharePoint Online using UserCustomActionsConfigPage (UCACP) github repo.  This is an important update because of a BIG thing that has just happened over at PnP side.

The PnP team has just released a SP2013/2016 Responsive UI pack

I jumped in a had a read, it uses the ScripLink way to attach a single javascript file, the file then looks for script id="PnPResponsiveUI"  element on the page, and attaches a CSS file.

My single page UserCustomActionsConfigPage does very similar things, except I use the ScriptSrc element in a UserCustomAction and that doesn't set the Script ID.

So this update to UserCustomActionConfigPage adds an additional textbox.  You can leave it blank.  But if you specify an ID, it will use ScriptBlock instead to insert the UserCustomAction.

New ID field

Installing 2013/2016 Responsive-UI pack with UCACP:

Copy three files into your Site Assets.   NOTE some browsers will save github files as HTML (because Github doesn't want to serve the files so it tells browsers these are HTML) - please double check the files are saved correctly as raw CSS or JS.


ID: PnPResponsiveUI
Url: SiteAssets/PnP-Responsive-UI.js

Usually, you can leave the ID blank.  But PnP-Responsive-UI.js needs it to be PnPResponsiveUI

Install to Current Web.  The Site User Custom Actions list should reflect there is now a SiteAssets/PnP-Responsive-UI.js inserted.  There is no ScriptSrc, because it is inserted via ScriptBlock.

The ScriptBlock is inserted using a Script tag attached to the head element.  This is identical to how PnP is doing it via PowerShell

One note - also, switch off your Mobile View feature.


What does it look like?

The Debugger shows both CSS and JS are injected correctly.  Note, I'm injecting from my own SiteAssets library.  PnP creates a folder under Style Library.

See the Responsive-UI in action with the Hamburger menus.

PnP PowerShell Installation

I want to reference drisgill's post on this Responsive-UI http://blog.drisgill.com/2016/03/a-look-at-the-pnp-responsive-ui-package-for-sharepoint-on-premises.html

He talks about the first impressions of the Responsive-UI, as well as a detailed section on how to install the Responsive-UI via PowerShell (as prescribed by PnP tools).

Installation with PowerShell is fine and dandy, but it assumes you are some sort of master magician.  Multiple downloads, and a dependency on 2015-CU.  (Which BTW you should have installed already).

I consider the PowerShell install perhaps a bit daunting and a barrier for people to try this customization on their site.

The UCACP way is 3 files.

Customization with the User Custom Actions is magical.  But we can leave out the PowerShell here this time :-)

Uninstall Responsive-UI Pack

And the Document Library view is back to normal.

Update 2018-05

Fixed some github broken links

Related Posts

ngSydney, Office Add-ins and lots of AngularJS

I went to my first ngSydney meetup on Wednesday night, and presented a short session on Office-Addin with AngularJS (I also throw in Graph API) and ran over my allocated time to 40 minutes.

I probably should have asked for 1hr.

Presentation

Here is the PowerPoint presentation.  Presentation: office-addin yo ngSydney

Also, check out all the examples on http://dev.office.com/

Updates

Graph API has Excel endpoints "coming soon".  These REST endpoints will let your app reach inside a workbook/worksheet/range/cell and pull/push stuff in and out like JSON goodness.

https://graph.microsoft.io/en-us/docs/api-reference/beta/resources/excel

Unfortunately, no Word REST API yet.

Clarifications

As I rushed through the demo some things perhaps wasn't as clear as I could explain.

1. There were two libraries/APIs - the Microsoft Graph REST API lets you talk to services across Office and eventually Microsoft space.  You need to register an Azure App so Graph knows what permissions you are after.  Your users need to authenticate and grant permission to your app to use the services that it is asking for.

2. The Office.js within a Office Add-In lets you talk to the current document, or mail within the Office App.  You need to register/deploy the manifest.xml file with your Office 365, or through network share or group policy for Desktop Apps.  The manifest describes what sort of permissions you are seeking on the current document, usually there is only Read or ReadWrite.

You can use Office.js and Graph API together as it was in my demo, or separately.

3. The 'app' I was running in the iframe for both Office 365 or Word 2013 is running out of https://localhost/ - I didn't stop to show this.

4. Authentication piece of the puzzle moves forward as well - next on the line is Progressive Permissions where an app can request more permissions on the spot and the user will be asked to allow additional permissions (write) on the go.

5. Office Addin is available in: Office 2013/2016, Office for Mac, Office for iOS.  Not yet available on Office for Android.  It also runs in Office Online (SharePoint Online, OneDrive, Docs.com) and within both Exchange Online (business) and Outlook.com (consumer).

Had a few awesome quotes: