Azure Logic Apps: Build SharePoint Workflows by clicking buttons: a picture guide


TOC: Azure Logic Apps

  • Build SharePoint Workflows by clicking buttons [This article]
    • Introduction
    • SharePoint Online
    • Office 365
    • Connect them all
  • Hybrid Workflows - SharePoint On-Premise
  • "Code", Template Language Expression
  • Observations
  • Social
  • XML


Introduction - What are Azure Logic Apps


Microsoft announced a series of Azure App Services today:

http://weblogs.asp.net/scottgu/announcing-the-new-azure-app-service


Specifically, I want to focus on Azure Logic Apps.

http://azure.microsoft.com/en-us/documentation/articles/app-service-logic-what-are-logic-apps/

In Microsoft's words.

Azure App Service is a fully managed Platform as a Service (PaaS) offering ... allow any technical user or developer to automate business process execution via an easy to use visual designer.

Best of all, Logic Apps can be combined with API apps and Connectors from our Marketplace to help solve even tricky integration scenarios with ease.


Microsoft has a tutorial on how to create Azure Logic Apps:

http://azure.microsoft.com/en-us/documentation/articles/app-service-logic-create-a-logic-app/

http://channel9.msdn.com/Shows/Azure-Friday/Azure-App-Service-Logic-Apps-with-Josh-Twist

You should go through these first.  There are a number of new Azure templates that are wordy to describe, but a video will show how it all works together fairly quickly.

So I only want to focus on the SharePoint Online Connectors.  They are easy to set up, but actually, tricky to find.


Create the Logic App


The Workflow:

  • Grab tweets from my twitter timeline and put them into my SharePoint Online List, then email me.


Once you watched the video and we start by creating our own Azure Logic App. 

image image

Once it's ready, head into Triggers and Actions - this is where the rules are defined.

image

On the right hand side you wouldn't have any API Apps in the resource group.  We'll configure them in a minute.  Click Visit the Marketplace


Configure the Office 365 Connector


image

There is a giant header at the top to add Office 365 Connector.  We should go ahead and add that. 

Note, in your happiness to add the Office 365 connector, you will, like me, completely fail to read "send and receive emails, calendar and contacts".  No files, or SharePoint sites.  Essentially, this connector is only for Exchange-related services.

Still useful for sending emails, so let's configure it.

image image image


Go back to Triggers and Actions on the Logic App

image

  • Sometimes - the API Apps are listed by their template name and not the API App Name that you've assigned.  This is actually very confusing, I'm sure it'll be fixed soon.
  • Adding either the Office 365 Connector or the SharePoint Online Connector will also add the HTTP and Recurrence API Apps automatically.


Configure the SharePoint Online Connector

http://azure.microsoft.com/en-us/documentation/articles/app-service-logic-connector-sharepoint/

So far so good.  Let's do the next one.  And I think you'll fall into another hole.

You look at this and you say, surely.  That one is for SharePoint, since the earlier Office 365 connector isn't.

image


image

Yes, I say.  That's exactly what I want.  Those are the right triggers and actions!

image

And here is the next hole I fell in.

Chances are, you got all the way to the end and thought why do I need a service bus for Azure Logic App to talk to Office 365.  Something don't smell right.

I have failed to read the text again - this one is for On-Premises SharePoint, and you will need to install a listener proxy that will talk to Azure Logic Apps via an Azure Service Bus.

We'll cover that later when we talk about Hybrids.

For now, go back to the Marketplace.

image

Use the search filter.  There are 2 SharePoint connectors.  The SharePoint Online Connector isn't shown in the default view.


image

Create -> Package Settings -> OK <- Create


TIP: Unpin


image

While you wait for the API App to be created, your Startboard is currently looking like a mess.  Right click on the other connectors and unpin from Startboard.


Add the Twitter Connector

This is in the video above.  So I'll jump through this one really quick.

image

More spinning.  All done!  OK now we have all our connectors.  Let's look at them.


Triggers


I want to show the various different triggers from different connectors.  But I won't actually use these in the later example.
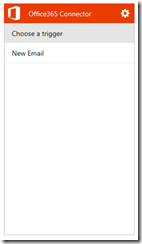
image image image image
Office 365 Trigger looks like this. SharePoint Online Trigger looks like this Twitter Trigger looks like this The trigger I want to use is a simple Recurrence timer.  It will run every hour.


Activities


image

Next, pull down some tweets.

Add Twitter Connector and Authorize

image image

Twitter Authorize, and set up to grab my timeline.

I want to put them into SharePoint Online.

image image

Click Authorize - you'll see a pop up

  • I want this to talk to my Office 365 Work Account - so pick the top one. 
  • Note - sometimes, it doesn't seem to work, I would close the pop up and try Authorize again.  I consider this another Preview Bug

image image

You should see these actions to perform on the connector.  Notice it connects to two lists specified during the setup, and there doesn't seem to be a way to change that afterwards.

Pick Insert Into tasks


We'll need to loop through the tweets and insert each one.

image  imageimage

We need to change the TweetText reference from the First tweet to Each Repeating Item tweet.

Change it from:

  • @first(body('twitterconnector')).TweetText

to

  • @repeatItem().TweetText


Last action is an email.  Add the Connector.

image image

The Office365 Connector (Exchange) is the same as Office 365.

I set the body to the created date of the first tweet (in descending order, so actually the latest tweet).

  • @first(body('twitterconnector')).Created_at


The big picture:

image


Save

image

:-)

You save and close the Triggers and Actions editor.

image

:-(

Thanks.  I think you forgot I had just saved...  (another preview bug)


Back on the Logic App screen, I see this:

image image

With a Recurrence trigger I find it always run first time I save.  But if it doesn't, you can manually Run Now


And the results


Here we have it.

The list, in my Tasks list on my SharePoint Online.

image


Email


The email I received.

image

  • I don't know why the email is default to send with low importance.  You can change this.


image image

Click the Pencil - I find that it is not intuitive that's clickable.  I think it should be next to the cog wheel.


And that's quite possibly the easiest Tweets to SharePoint Online List example (including set up the infrastructure) that I have ever done.

Summary


  • Created Office 365, SharePoint Online, Twitter connectors.
  • Created Azure Logic App on recurrence schedule
  • Write tweets to SharePoint List
  • Next episode, we'll look at Hybrid.  Going Cloud to/from On-Premises. 

Nintex Workflow - Modifying your Farm UDA


The Problem

I love Nintex UDA - it lets me push commonly used logic into a reusable User Defined Action.  Then lets me reuse it in multiple workflows.  What's even better, is when I update the UDA, I can choose to republish all the workflows that currently use this UDA, which updates them all too.

There are however two problems with the UDA:

  • They are scoped at Site, Site Collection or Farm levels, and they are stored with a unique UDA-ID in the Nintex workflow database.
    To share the UDA in two different Site Collections, you have to promote the UDA to the high level Farm scope.

    image
  • Once you have promoted them to Farm level, you can no longer modify them.  Because they are managed via the Central Administration website, and WorkflowDesigner.aspx doesn't work there.


A solution


The solution I've gone with, which I hated.  Was this:

  • in our development environment, we keep the UDA in the site collection level. 
  • in our production environment, we keep the UDA in the farm level.
  • we modify in development environment via WorkflowDesigner and then we export the UDA and import them in production to override the old version.


Con:

  • Dev and Prod aren't the same configuration.
  • You always have to export and import.  You can't change a single setting in production.

I've actually done this for the last 3 years.  At one point, I was so unhappy with this I send meme pictures to the Nintex Workflow team.

clip_image001


A better solution


My colleagues Justin Nash and Bart Bouwhuis told me that actually, I can just hack the WorkflowDesigner.aspx URL and modify a farm level UDA.

For example, here is a Site Collection UDA:

I can modify the farm UDA if I know the WorkflowId and the UdaId.  Well, the UdaId is simple.

Here's a farm level UDA:

You can find the WorkflowId if you export the UDA from Farm, and open it up in a text editor. 
You'd see:  <Id>3c2d163c-41da-4966-90ca-a2727d94ead8</Id>

So combined the two together,

Opens the Farm UDA and lets me modify and publish it.

There is an extra note.

image

When Publishing the UDA, don't click the republish checkbox.  Since that is filtered to workflows only in the current Site Collection.

Instead, after you published your UDA.  Go back to Central Administration.

Click the Analyze UDA Ribbon and Republish from Central Admin.

image


A quick SQL view


If you can't be bothered digging around for the WorkflowId - you can dump this from Nintex Workflow Database:


select
    Name,
    [Description],
    Id,
    StaticId,
    '/_layouts/NintexWorkflow/WorkflowDesigner.aspx?Category=UserDefinedAction&WorkflowId=' + ltrim(StaticId) + '&UdaId=' + ltrim(Id)
from
    NW2010DB.dbo.UserDefinedActions
where
    SiteId is null
and
    WebId is null
   

image

Nintex Form - working with managed metadata fields


This is a post I wrote late last year, and applies to the Managed Metadata Fields in Nintex Forms via some "JavaScript middle-tier magic". 


Disclaimer

My conversations with the Nintex Form team back then was that at some point they might stop using the SharePoint Managed Metadata Fields and switch to their own control (similar to what they do with the people picker).  Then the following JavaScript code around Managed Metadata fields would stop working.


Goals

Nintex has a JavaScript wrapper API (NF.PeoplePickerAPI) around their People Picker Control.

Create something similar that allows me to wrap a Managed Metadata Field.


SPG.ManagedMetadataApi


(function (SPG, $, undefined) {

    var ctor = function (elem) {
        this.$elem = $(elem);

        var $taxonomyEditor = this.$elem.find(".ms-taxonomy");
        if ($taxonomyEditor.length) {
            this.controlObject = new Microsoft.SharePoint.Taxonomy.ControlObject($taxonomyEditor.get(0));
        }
    };

    ctor.prototype = {

        replaceTerm: function(label, termGuid) {
            var self = this;
            if (self.controlObject == undefined) return;

            var term = new Microsoft.SharePoint.Taxonomy.Term(label + "|" + termGuid);
            self.controlObject.replaceTerm(term);
        },

        clear: function() {
            var self = this;
            self.setRawText("");
        },

        setRawText: function (text) {
            var self = this;
            if (self.controlObject == undefined) return;

            self.controlObject.enableControl(true);
            self.controlObject.setRawText(text);
            self.controlObject.retrieveTerms();
            self.controlObject.validateAll();
        }
    };

    SPG.ManagedMetadataApi = ctor;
})(window.SPG = window.SPG || {}, NWF$);


Usage


  • List: My List
  • Field: MMField


/*
    using "normal" GET REST request doesn't bring back ManagedMetaDataFields, this is a workaround.
    https://social.msdn.microsoft.com/Forums/sharepoint/en-US/92cccd65-ba4c-4870-a858-7cd0e38a0482/how-can-i-use-caml-queries-with-the-rest-api
    because GetItems is a method on the List, this needs to be a POST operation.
*/

var url = _spPageContextInfo.webAbsoluteUrl +
    "/_api/Web/Lists/getByTitle('My List')/GetItems(query=@v1)" +
    "?@v1={'ViewXml':'<View><Query><Where><Eq><FieldRef Name=\"ID\"/><Value Type=\"Integer\">" + siteID +  
    "</Value></Eq></Where></Query></View>'}";

var promise = NWF$.ajax({
    type: "POST",
    url: url,
    headers: {
        "accept": "application/json;odata=verbose",
        "X-RequestDigest": NWF$("#__REQUESTDIGEST").val()
    },
    contentType: "application/json;odata=verbose",
    dataType: "json",
    cache: false,
    processData: true
});

promise.done(function (data) {

    var row = data.d.results[0];

    // similar syntax as NF.PeoplePickerApi
    var $mmField = new SPG.ManagedMetadataApi("#" + fieldMMField);
    $mmField.clear();
    if (row.MMField) {
        $mmField.replaceTerm(row.MMField.Label, row.MMField.TermGuid);
    }
});

taskeng.exe command prompt - get out of my face


So I was minding my own business working, and suddenly, a command prompt popped up, blocking my work for a few seconds and then disappeared. 

Very annoying.  Because now I'm distracted.  I need to hunt this thing down.


Figure: It can look like this.


A quick Bing search reveals that this is actually frequently reported, but most people have the wrong idea to go about fixing this.  They think "oh this is a virus, because I don't know what it was", so I'm going to run anti-virus and just blast away everything.


Here's what you should do.


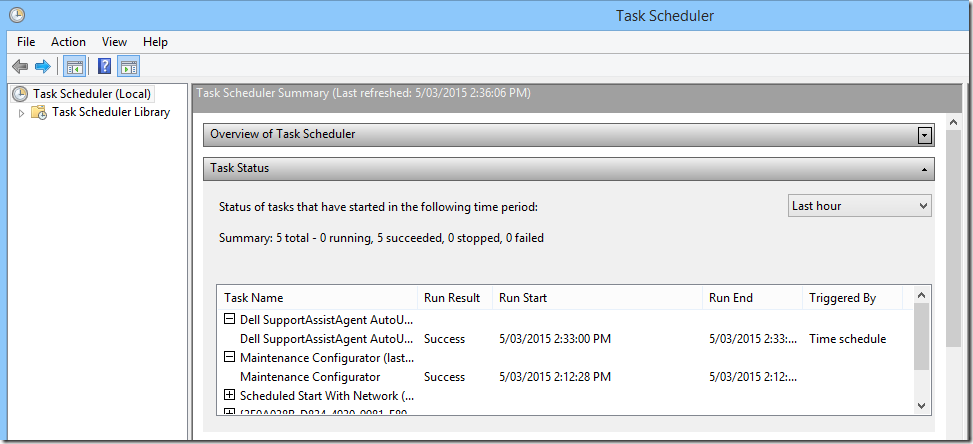
Task Engine is Windows' Schedule Tasks.  It is running something.  That something can be a virus, but most likely, something you have installed.

  • So run Task Scheduler
  • Expand the "Task Status" area - this shows you tasks that has run in the selected time period.  You will see there are hundreds of tasks that has ran and will be running.
  • Change the time period filter to the smallest setting "Last hour"
  • Now pick off the single task just just ran.  Moments ago.

image


Bingo!

Dell SupportAssistAgent AutoUpdate


Task Schedule Library


  • Head to Task Schedule Library on the side menu
  • Find the task that's the culprit


image


Strangely, this app checks for update at 2:33PM every Thursday, right after lunch.  It's been annoying me for nearly a month.  I must have installed it on 13/02/2015.

Now, it's a fairly harmless app doing it update check.  Instead of just disabling the task, I can also:

  • Move the trigger to logon
  • Change the time to 1pm (lunch)
  • Or my favourite - wait for Idle


image


So, at Thursday 1PM, wait for up to an hour (so between 1pm to 2pm) for my computer to be idle for 15minutes.  Then you can run this app.  When I'm not watching.


Perfect

Working with XML in Nintex Workflows (simplified)


Problem:

You call an XML web service with Nintex Web Service or Web Request actions.  You get back a lot of XML, and it is very difficult to work with the namespaces getting in your way.


Solution:


1. Do a quick XSLT post processing in the action, remove all the namespaces with XSLT transform.

<xsl:stylesheet xmlns:xsl="http://www.w3.org/1999/XSL/Transform" version="1.0">    
<xsl:template match="*">        
    <xsl:element name="{local-name()}">            
    <xsl:apply-templates select="@* | node()" />        
    </xsl:element>
</xsl:template>    
<xsl:template match="@*">        
    <xsl:attribute name="{local-name()}">            
    <xsl:value-of select="." />        
    </xsl:attribute>    
</xsl:template>    
<xsl:template match="text() | comment() | processing-instruction()">
    <xsl:copy />    
</xsl:template>
</xsl:stylesheet>


2. Force top level XML node.

This ensures if your service returns multiple top level elements they get wrapped together.


3. Use XPath in Query XML Action like this:

/xml/Results/Result/Title


Sometimes, after you've wasted half a day working with XML, you just want the simple, no frills, just make it work version.

This will hopefully help you too.


Big thanks to Jumpei Yamauchi for helping me with this one.