SPS Canberra 2014 - Building SharePoint 2013 Workflows Apps (post-show notes)


On Friday afternoon I drove down to Canberra for SharePoint Saturday.  It really was a wonderful afternoon.

WP_20141017_17_36_24_Pro


Building SharePoint 2013 Workflow Apps


My talk focused on Building SharePoint 2013 Workflow Apps.  That is, practical examples of what you can build with Workflow Manager for both Office 365 and SharePoint 2013.  Lots of individual examples, Workflow Custom Activities, and a full SharePoint App with Forms, Lists and Workflows (and I found this humourous: no C# or JavaScript).


Questions

A question was asked about parallel tasks, the short-cut logic and whether it could be done for approval workflows that required (3 out of 5) votes to progress.  While I think that would be possible, the Out Of Box Composite Task covers that scenario directly so you don't need to build this via a tricky Parallel Task.  Much applause for Microsoft.


Why is REST the best thing in the slide

I didn't stress this point enough.

Traditionally, when MS adds new services or methods, we need to wait for MS (hahaha) or ask someone to build a custom activity to use them in the workflow.

Now, in SP2013 - REST is first class.  That means any new service gets a REST end point.  Want to work with Delve?  There's a REST API for that.  That means, automatically that as soon as the API is available, you can use it in your Workflow.

That means, Workflow is also first class.

That is why this is the best thing in SP2013 Workflows. 


Demo Fail

I was not able to add the Artezio Workflow Custom Activities in SharePoint Designer 2013.

https://sp2013workflowactivities.codeplex.com/

This is because Workflow Custom Activities can be packaged in a solution as part of "App" or "Sandbox Solution"

The activities that I had in my demo site were packaged as App.  That means they could be used in my App within the App Web, but not directly in the Host Web by SharePoint Designer.

If you are using SharePoint Designer and want to use the Workflow Custom Activities, you need to grab the sandbox solution and activate that on your site first separately.

The codeplex project has both types of solution.

https://sp2013workflowactivities.codeplex.com/releases


Integrated Workflow Apps

Because of time, I did not cover this point.  Integrated Workflow Apps is a variation of the Workflow App for SharePoint.  The distinction being that the workflows defined in the App (which then runs in the AppWeb) is available for Workflow Associations in the Host Web (instead of the App Web).

This is very useful if you want to build complex Approval workflows and have the logic run in the App Web, but still allow users to associate that workflow to their libraries in their own sites.

At the moment, Integrated Workflow Apps can only be created via editing the XML in the solution package.  VSNET support will be updated in the future to provide a UI for this type of set up.


The Sample Project is not completed

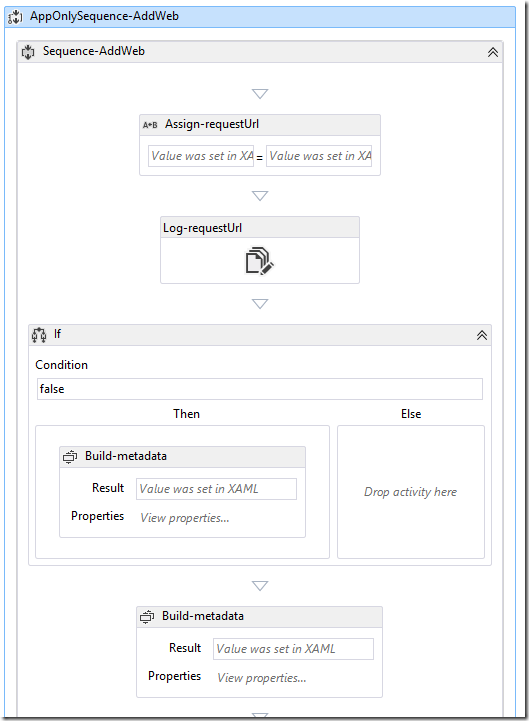
There are still plenty to do to complete the workflows, but the key points are there - flow-chart, parallel actions, scopes, workflow activity, permissions, app step.

 

Downloads

Setting up Azure Service Bus for debugging SharePoint 2013 Workflows

If you follow the instructions on http://blogs.msdn.com/b/officeapps/archive/2013/03/21/update-to-debugging-sharepoint-2013-remote-events-using-visual-studio-2012.aspx to set up an Azure Service Bus to debug your SharePoint 2013 you need to take careful note of this starting paragraph.

Update 9/19/2014: Please note Microsoft Azure Service Bus now supports two types of connection strings: SAS and ACS. For remote event debugging via Azure Service Bus, only ACS connection string is currently supported as shown below. Follow the instructions in Service Bus Authentication and Authorization to get an ACS connection string for any new Service Bus namespace created after August 2014.

I skim read, so I missed it, twice.  And then spent a lot of time digging through why my brand new Azure Service Bus (SAS) doesn't work with SharePoint 2013's debugging.

To redeem myself and me ranting at other people (for my own fault of ... not-reading).  I present the following:

The newbie picture guide on how to set up Azure Service Bus for Office 365


Go here: http://azure.microsoft.com/en-us/downloads/

Scroll down and install the command line tools.  I went with the Windows PowerShell option on the left.

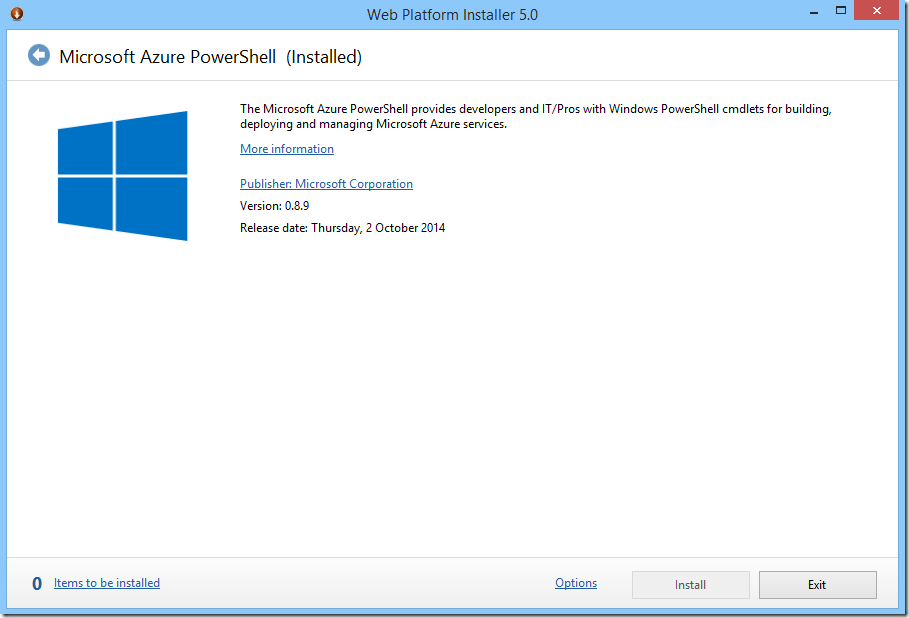
The download will run the Web Platform Installer, which then lets you install MS Azure PowerShell

image


Installed, it is here.

image


Run two PowerShell commands.

  • Add-AzureAccount will open a browser window, allowing you to sign in with your Office 365 account and download a policy file
  • New-AzureSBNamespace -name <name> -location '<region>' -CreateACSNamespace $true


image


The Service Bus can be managed via the web interface - they just can't be created.

It appears as type "Mixed"

image


Set Up VS.NET

This will now give you an old style ACS connection string that you can use in VS.NET's project properties.

image


And here is VS.NET happily debugging Office 365 workflow again.

image


For completeness: this is the Wrong Way, if you use the Azure Portal

image


Looks different.

image


ACS Connection String looks like this:

  • Endpoint=sb://debug-jl.servicebus.windows.net/;SharedSecretIssuer=owner;SharedSecretValue=<code>=

SAS Connection String looks like this:

  • Endpoint=sb://debug-bad.servicebus.windows.net/;SharedAccessKeyName=RootManageSharedAccessKey;SharedAccessKey=<code>=


The SAS Connection String does not currently work with VS.NET


Summary


  • Download Azure PowerShell (or Azure CLI via npm) - they are two different things, don't mix them.
  • Run two PowerShell commands to create the old Azure Service Bus (with ACS)
  • Thank Greg Hurlman@justcallme98 and ☞ Scott Hoag ☜@ciphertxt for reaching out and assisting me with my bad Azure skills.
  • Apologies to people that had to read my uneducated rant.  I retract all of it.

Small Powershell Adventures -NotIn and Arrays


PowerShell v3 has a new syntax I quite liked:

$badIDs = "73574929","73573581","73575402","73576325","73575586","73575377","73574920"

for($i = 0; $i -lt $rows.length; $i++) {

    $row = $rows[$i];
    #echo $row
    $imageID = $row.ImageID
    if ($imageID -ne "none" -and $imageID -NotIn $badIDs ) {
        # don't do stuff
    }
}

Trouble is, this isn't available natively in PowerShell v2 (which is still quite common if you work on SP2010, Windows Server 2008R2).

Fortunately, we can just use Array.IndexOf static method to replace this.

if ($imageID -ne "none" -and [Array]::IndexOf($badIDs, $imageID) -eq -1 ) {
    # don't do stuff
}

KO binding for two SharePoint rich text editor controls


For a while now, I've been experimenting with a simple HTML editor for my forms.  Something to work with JavaScript databinding, in my particular case, KnockoutJS.


Why not TinyMCE and CKEditor?


But both libraries wants me to embed a bunch of additional 10-20 files.  I'm trying to build an App, which means packaging my assets.  I'm not going to package 20 files. 

Additionally, both TinyMCE nor CKEditor has official support for KnockoutJS binding anyway.  You end up on StackOverflow using someone's binding code.


An idea strikes!

Why not just use SharePoint's Rich Text Editor controls?  As long as you can create an ASPX page, you can use these controls that are out of the box.  As long as I don't postback, it doesn't matter what's the value inside of the controls.


SharePoint InputFormTextBox


image

<sharepoint:InputFormTextBox title="Title" class="ms-input" data-bind="spInputFormTextBox: CommentText1" ID="CommentTextBox1" Runat="server" TextMode="MultiLine" Columns="40" Rows="5" RichText="True" RichTextMode="Compatible"/>


Knockout Two-Way Binding:


ko.bindingHandlers.spInputFormTextBox = {
    init: function (element, valueAccessor, allBindingsAccessor, context) {
        var modelValue = valueAccessor();
        var value = ko.utils.unwrapObservable(valueAccessor());

        var baseElementID = $(element).attr("id");
        $(element).val(value);
        RTE_TransferTextAreaContentsToIFrame(baseElementID);

        //handle edits made in the editor
        var doc = RTE_GetEditorDocument(baseElementID);
        if (doc == null) return;

        var $editor = $(doc.body);

        $editor.on('blur', function (e) {

            RTE_TransferIFrameContentsToTextArea(baseElementID);

            var $elemSave = $("#" + baseElementID + "_spSave");
            if ($elemSave.length) {
                modelValue($elemSave.val());
            }
            else {
                modelValue($(element).html());
            }
        });
    },
    update: function (element, valueAccessor, allBindingsAccessor, context) {
        //handle programmatic updates to the observable
        var value = ko.utils.unwrapObservable(valueAccessor());

        var baseElementID = $(element).attr("id");
        $(element).val(value);
        RTE_TransferTextAreaContentsToIFrame(baseElementID);
    }
};


Thoughts:

  • SharePoint:InputFormTextBox is a nice little control you can drop in anywhere.  It's been around for a long time too, since SharePoint 2007. 
  • RichTextMode="Compatible" mode creates a smaller rich text control with a tiny toolbar. 
  • Biggest problem, is this control is IE-only.  Does not render nicely on other browsers.
  • The KnockoutJS data-bind syntax is very clean and can be used directly on the control.
  • Explanation: the Javascript focuses on borrowing the RTE_Transfer* functions in SharePoint to copy the value to a hidden field, then grab the HTML from there back to the observable.  This borrows SharePoint's other javascript function to clean up the HTML and do a bunch of encode/decode things.


SharePoint RichTextField


image


<div data-bind="spRichTextField: CommentText1">
<sharepoint:RichTextField CssClass="ms-input" ID="CommentTextBox1" Runat="server" FieldName="CommentText1" ControlMode="New"/>
</div>

KnockoutJS Two-Way Binding:


ko.bindingHandlers.spRichTextField = {
    init: function (element, valueAccessor, allBindingsAccessor, context) {
        var modelValue = valueAccessor();
        var value = ko.utils.unwrapObservable(valueAccessor());

        var $inplacerte = $(element).find("div.ms-rtestate-field.ms-rtefield div[id$=TextField_inplacerte]");
        $inplacerte.html(value);

        //handle edits made in the editor
        $inplacerte.on('blur', function (e) {
            var RTEhtml = RTE.Canvas.getEditableRegionHtml($inplacerte[0], false);

            modelValue(RTEhtml);
        });
    },
    update: function (element, valueAccessor, allBindingsAccessor, context) {
        //handle programmatic updates to the observable
        var value = ko.utils.unwrapObservable(valueAccessor());

        var $inplacerte = $(element).find("div.ms-rtestate-field.ms-rtefield div[id$=TextField_inplacerte]");
        $inplacerte.html(value);
    }
};


Thoughts:

  • The SharePoint Rich Text Field works on every browser, and it shows a nice Ribbon for interacting with rich text.
  • To use this, you do need to tie it to a Field on the current list item (which would be the page), this is quite annoying to set up.
  • I use data-bind to pull the value out and work with it via Javascript - so I don't actually bother with saving back to the list item via the UI.
  • You can't add the data-bind attribute to the RichTextField control.  It will complain about not knowing what the attribute is.  I work around this by wrapping the binding syntax outside of the ASP.NET control and use jQuery to look for the DOM elements within.
  • Explanation: This borrow SharePoint's RTE.Canvas javascript class to update and retrieve HTML from the Content-Editable DIV.  Again, SharePoint's Javascript does a bunch of encoding/decoding that makes the HTML nice to read at the end.

Demystifying SP2013 Workflow AppStep


A SharePoint 2013 workflow essentially can run as two different accounts.  The current user, or AppStep (which runs the action as the Workflow App account).

image

You will need to activate this feature.

But this is not where these notes end.


SP2013 AppStep is not the same as SP2010 Impersonation Step


In SP2010, when you use impersonation step, you gain additional activities, and because SP2010 doesn't have the concept of different permissions impersonations - essentially those activities lets you perform the action with elevated privileges in the code.


In SP2013, everything is an App.  That includes workflows.  So, when you activate this feature, you gain:

  • Ability to have App Step in your workflow designer (SharePoint Designer or Visual Studio .NET)
  • App Step runs the actions inside with App Permissions, and this is important: the App only has Read and Write.  It does not have full control or manage or any other fancy pants abilities.
  • When App Step updates the list item, you get a nice message on the list item that says Updated by Workflow on behalf of (user).

image


The power of HttpSend


You can of course call all the fancy new SP2013 REST API in your workflow.  http://msdn.microsoft.com/en-us/library/office/dn268594(v=office.15).aspx  - This gives your workflow a lot of power.  You can do this either as the current user or in the App account context.

image


Fabian and Chris has documented a number of really great articles on this.

Andrew Connell also has a great segment on Plural Sight on REST services.


There are ways to increase that permission level


If you are on-premises, there is a powershell command to grant the Workflow App account additional permissions.

Set-SPAppPrincipalPermission


If you are on Office 365, there is a hidden URL that lets you re-apply a permission mask to the Workflow Account.

/_layouts/15/appinv.aspx


Apps for SharePoint

Of course, the way Microsoft wants you to build workflows in the cloud would not be via a hidden URL.

The best way (but somewhat tricky at the moment, as tooling gets better this story will improve) is to build SP2013 workflows within an App for SharePoint.  The workflow is deployed in the App web, and has the same permissions that the user grants to the App web.  You can request additional permissions as you package your App and those will be available to the Workflow as well.

So this is fantastic for building self contained apps where lists, list definitions, javascript forms and SP2013 Workflows all tie together to form a small bit of functionality.

But having workflows in the App Web means that it can't be added to existing document libraries or lists or sites in the host web.  So there are a number of scenarios where Apps for SharePoint doesn't work that well.  I have been using SP2013's Sandbox Solutions for this purpose.  But Sandbox Solution Packages doesn't have its own App permissions (and thus you'll need to see the previous point about how to elevate that afterwards).


Integrated Workflow Apps

Microsoft has begun to talk about the new Integrated Workflow Apps in more detail.

The new syntax available for Integrated Workflow Apps will basically allow you to install workflow packaged as an App for SharePoint, but instead of deploying the Workflow to the App web, it will be deployed and made available on the Host Web. 

But tooling will need to improve in a future VS.NET update.  This is something I want to blog again later as more details are available.  But for now, there's a great link here.

There are a few pieces of the puzzle missing, and one may need to build additional javascript based UI to deploy assets (lists and workflow associations) to the host web.  But I'm loving the choices and I think SP2013 Workflows is moving in a fantastic direction.