InfoPath 2010 - embed HTML for rich and web forms
Do we like the SharePoint content editor web part? Yes!
What if there’s a way to add your own HTML in your InfoPath form, and have it appear for both web forms and rich (InfoPath Filler) forms?
Here are the quick steps:
-
Create an external XML file to store the HTML we need
-
Add the external XML file as a secondary data source for the InfoPath form
-
Use the Rich Text control and bind the result from the secondary data source
-
Using resources in the form (images, CSS)
-
Tricks for InfoPath Filler Rich Form
-
Tricks for InfoPath Browser Form
-
Adding your own CSS
-
Notes
-
Script tag doesn’t work (stripped from rich text control).
-
Steps to refresh HTML content of the XML resource
1. Create the XML file
This is documented in MSDN Inserting line breaks into text using Rules
This is pretty much the same thing - I’m inserting a namespace here so InfoPath knows this is a HTML block of text.
Save it as html.xml
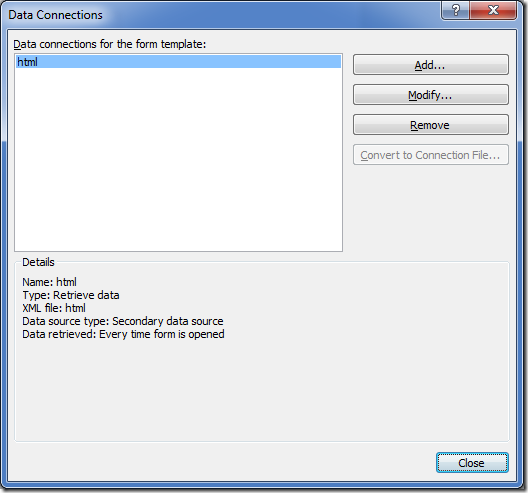
2. Add the XML file as a secondary data source
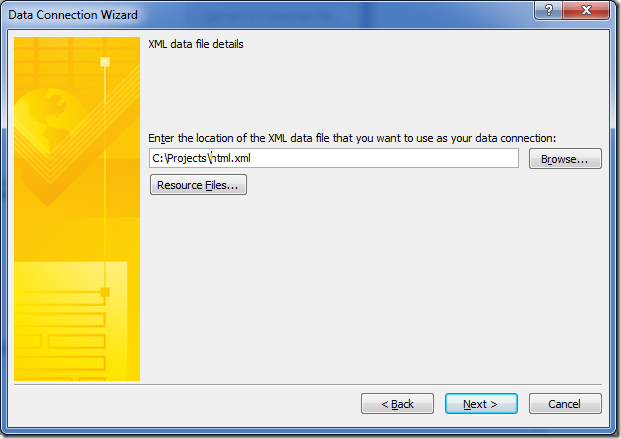
Figure: Add a secondary XML document
3. Use the Rich Text control and bind the result from the secondary data source
Remember to change the Rich Text Box to Read-Only
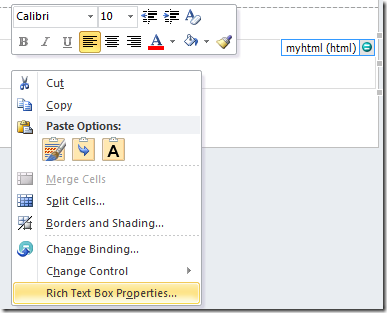
Figure: Add a new rich text box, then change it’s binding
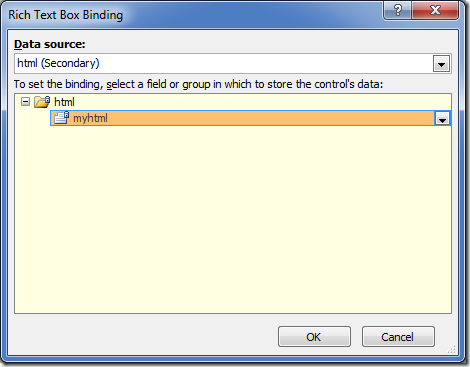
Figure: Bind it to the secondary data source
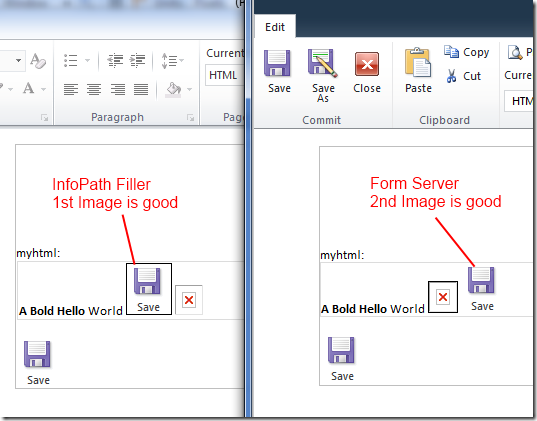
Run it in Preview (InfoPath Filler)
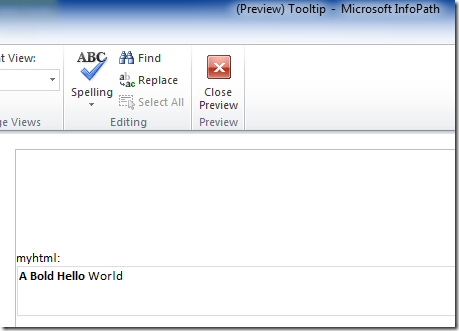
Figure: InfoPath Filler - looks good
Publish and run in browser (Browser Form):

Figure: InfoPath Form Server - also looks good
4. Use Image from form resources
Let’s go one step further and play with resources such as images. Add an image into the form’s resource files
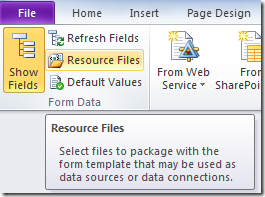
Figure: Go to resource files
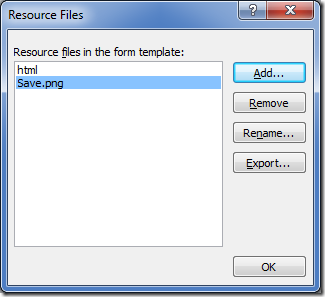
Figure: Add a picture “Save.png”
Modify the HTML to refer to this image.

Preview this:
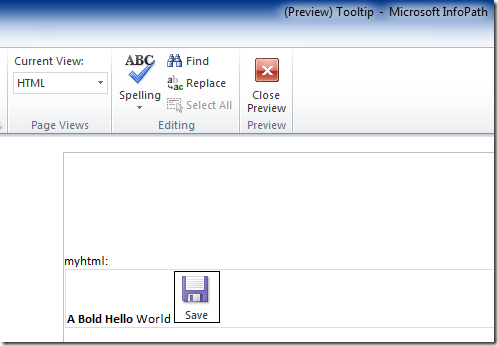
Figure: works great in InfoPath Filler
Publish and view in Form Server:
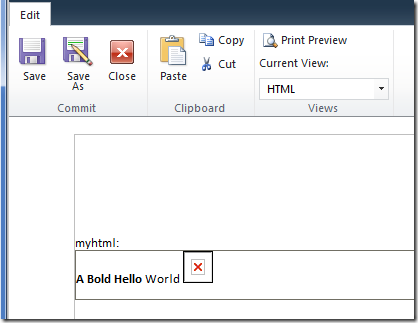
Figure: Doesn’t work so well in Browser Form
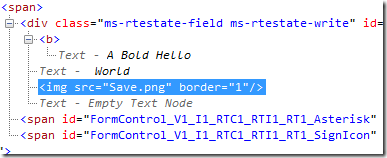
Figure: Raw HTML
4.1 Using form resources in Form Server
Let’s see how does the Form Server handle images.
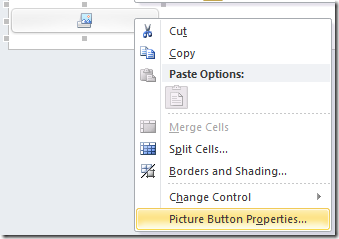
Figure: Create a picture button

Figure: Set the Picture to the resource
Publish, then check HTML source in the browser for the new picture:
<img style=“width: 100%; height: 50px; position: static;” alt="" src=http://server/_layouts/FormResource.aspx?solutionId=XXX&solutionFile=Save.png hoverSrc=""/>
So the format is:
/_layouts/FormResource.aspx?solutionId=xxx&solutionFile=Save.png
Update this back in our HTML file.

IMPORTANT: Remember to escape the & in the query parameter to &
Publish to Form Server again:
Compare the same form published on two different clients:
5. Add your own CSS
Let’s try some other tags, this is the STYLE tag:
<style xmlns=“http://www.w3.org/1999/xhtml” >
img {
border: dotted 2px purple !important;
}
<b xmlns=“http://www.w3.org/1999/xhtml”>A Bold Hello World
<img xmlns=“http://www.w3.org/1999/xhtml” src=“Save.png” />
<img xmlns=“http://www.w3.org/1999/xhtml” src=”/_layouts/FormResource.aspx?solutionId=XXX&solutionFile=Save.png” />
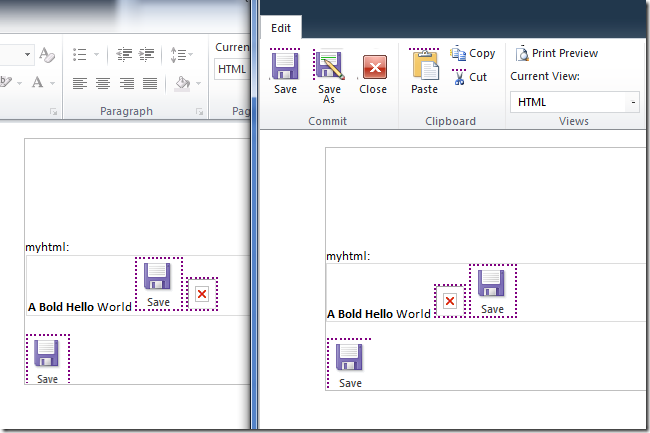
Purple dotted borders. Notice how it is also affecting the Ribbon in the Browser Form.
Use this to your advantage ;-)
6. Notes
- Firstly,
- Refreshing the XML file when you update it is a bit of a painful process. This is just the way it is with secondary data sources in SharePoint. If you are using offline files, you need to go through the wizard again to overwrite the previous connection (and refresh your offline cache). But if you are storing that XML file in SharePoint - you can just publish a new version there and tell InfoPath not to cache it.
Discussions