InfoPath - binding Linked Picture Display Text for dynamic tooltips

InfoPath is an ideal tool for XML forms.  Whenever you have forms, invariably, you have little helper icons to suggest text to your users regarding how to fill out a form.

In InfoPath, the Picture control allows you to have alt text.  But this is hard coded and you can't easily change this without modifying your form template.  If you are using the icons in a repeating section, there is also no way to make them different, and display different tooltip based on different rows in the sections.


That's all about to change.  :-)

The Linked Picture Schema

I was experimenting with a different control in InfoPath: the Linked Picture control.

http://msdn.microsoft.com/en-us/library/dd959291.aspx

<img hideFocus="1" class="xdLinkedPicture" xd:boundProp="src" xd:binding="my:field1" 
xd:boundPropSecondary="displaytext" xd:binding_secondary="my:field1/@my:field2"
tabStop="true" tabIndex="0" xd:xctname="LinkedImage" xd:CtrlId="CTRL2"> <xsl:attribute name="src"> <xsl:value-of select="my:field1"/> </xsl:attribute> <xsl:attribute name="displaytext"> <xsl:value-of select="my:field1/@my:field2"/> </xsl:attribute> <xsl:attribute name="alt"> <xsl:choose> <xsl:when test="string-length(my:field1) &gt; 0"> <xsl:value-of select="my:field1/@my:field2"/> </xsl:when> <xsl:otherwise>Click here to insert a picture</xsl:otherwise> </xsl:choose> </xsl:attribute> </img>

My highlights in the above XML:  the Linked Picture control, at the schema level, supports two level binding - both the image's SRC attribute as well as the DISPLAYTEXT attribute.  Which is then translated to the alt attribute in the XSLT.

Very interesting.


Hmm...  It has always been there!  Since 2010.  Why didn't anyone tell me this

I thought I might need to resort to XSLT hacking in order to get this to work, but I decided to look at the Ribbon controls for the Linked Picture control in InfoPath.  Behold!

clip_image002[5]

There are two sections of binding on the Control Tools ribbon for a Linked Picture control.  The left one, controlling the main binding, is for the SRC.  The right is actually for the Display Text!


Prepare a file to bind to

The XML file you can bind to:

<?xml version="1.0" encoding="utf-8"?>
<html>
    <img-info>http://server/Style Library/Images/info.png</img-info>
    <tooltip1>These guys are cool!</tooltip1>
</html>

Add this as a secondary data source, and bind the two properties to fields on this XML file.


Store the XML on SharePoint server

image

I suggest storing this file on the SharePoint server.  And then configure InfoPath to obtain the XML from the source server.  This way, each time you open the Form, it will read the most up-to-date version.


Content is now dynamic

This means you can update the image src or title attribute in the XML file dynamically.

You can also update the image without having to redeploy the form.

If you want to change an icon in your form - now they are all stored within SharePoint.  If you want to change the display text, change it in the XML file in SharePoint.  No template re-deployment required.

Your business analyst wants to tweak the words used in the tooltip?  Get him to update the XML file directly in SharePoint.  As long as he doesn't break the XML encoding it's very simple.  No need to update InfoPath.


Image is dynamic.  Form template just got smaller

A bonus of this technique is that the image isn't stored inside the template file.  So your template is now smaller.


Two independent bindings

The two binding are independent, and don't have to come from the same node in a XML source.

This means, you can have a repeating section showing tooltip icons.  Each image's SRC is bound to the same image URL.  But each tooltip can be bound to a repeating field in the repeating section. 


Example

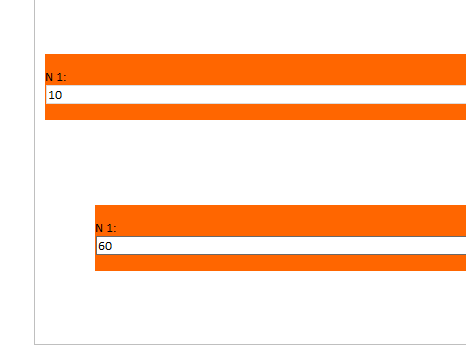
Tooltip working - now works by binding:

  • In this case here, the Picture is bound to the URL from the static XML file.
  • The tooltip text is bound to the database field returned from the service call.

clip_image002[7]


Works in both Web Forms and InfoPath client forms

Works in InfoPath client as well as web forms*


* Web Forms has an issue where sometimes Javascript will overlay on top of your Linked Picture, preventing the tooltip from showing up.  You'll need to add a small bit of Javascript to cancel this when the Linked Picture control is read-only.

InfoPath - missing data connection files


Sometimes, your InfoPath doesn't show you all the data connection files available in your SharePoint data connections library:

image

In this screenshot, it is only showing 3. 
There is no way to navigate to see more.


Fix. 

Change the Item Limit in the default view for the Data Connection library in SharePoint.

image


Change that number.  The default is usually 30.  I had previously changed it down to 3 to take the earlier screenshot.  Let's bump it back to 300.


Now you can see all the data connections again.

image

Modifying CSS Styles based on InfoPath field without code

This is an article expanding on a comment I made previously on the Microsoft InfoPath forums.

http://social.msdn.microsoft.com/Forums/en-US/sharepointcustomizationprevious/thread/4a8dbae1-4641-4ee2-b034-3768ebda5a47

The Problem

How do we modify the margin of a column based on a field within InfoPath. 


Solution

Invoking dark magics of XSL (you have read the disclaimer).  This is totally unsupported, but fun.

  1. Create a new form, add a number field "n1".
  2. Put this field onto the design area within a section
  3. Create a rule on the section, "if n1 > 0", make the background red.
    (these steps are useful to set up the form to a stage where we can add additional rules).
  4. save your form as "MarginForm.xsn", we're about to do unsupported magic. 
  5. go to File | Publish | Export | Export Source Files - save the component files of your form into a blank folder, e.g. "C:\Temp\MarginForm\"
  6. close InfoPath designer, go to your folder, and look for the XSL file for your view, typically, it's <view name>.xsl.  For me, this is: C:\Temp\MarginForm\view1.xsl
  7. Open the xsl in a text editor - preferably one that understands XSL to give you syntax highlighting.
  8. Find our formatting rule, it looks like this:
    <xsl:attribute name="style">BORDER-BOTTOM: 0pt; BORDER-LEFT: 0pt; WIDTH: 100%; MARGIN-BOTTOM: 0px; BORDER-TOP: 0pt; BORDER-RIGHT: 0pt;<xsl:choose>
    <xsl:when test="../my:n1 &gt; 0">BACKGROUND-COLOR: #ff6600; caption: Rule 1;</xsl:when>
    </xsl:choose>
    </xsl:attribute>
  9. add additional formatting for margin-left, like this:
    <xsl:attribute name="style">BORDER-BOTTOM: 0pt; BORDER-LEFT: 0pt; WIDTH: 100%; MARGIN-BOTTOM: 0px; BORDER-TOP: 0pt; BORDER-RIGHT: 0pt;<xsl:choose>
    <xsl:when test="../my:n1 &gt; 0">BACKGROUND-COLOR: #ff6600; caption: Rule 1; MARGIN-LEFT: <xsl:value-of select="../my:n1"/>px;</xsl:when>
    </xsl:choose>
    </xsl:attribute>
  10. save your XSL, close it.  Open  the whole thing back in InfoPath designer from manifest.xsf
  11. test it and save it back into MarginForm.xsn file.
  12. Once you are comfortable and understand what's going on, clean up the rule in xsl (don't use the designer) and get rid of the rule for "red".

The Results


Download Files


A site maintenance notice.  I've removed all back references on the site - they were being spammed like crazy and I wasn't doing a good job of cleaning them up.  If you need a back reference, please leave a comment and I'll verify them.

InfoPath - reading template.xsd in code for type checking

InfoPath is the world's most advanced XML-based form system.  Each InfoPath document is a fully structured XML file, and the template contains the XSD schema definition for the XML file.  This includes a bunch of information such as min/max occurrences, as well as the type information for each of the elements.

Because the information for the element's type is stored separately in the xsd file, it isn't possible at runtime to workout what the type of each element is supposed to be. 
When we are given:

  • my:value1

If we can't read the template.xsd file, we don't know if that's a number, a string, a datetime nor do we know if the field is nillable.  Some fields in InfoPath, such as the boolean and the datetime fields, can't be blank.  They have to be set to nil.


Here's how you can read the template.xsd in code

An InfoPath Form


Here is an InfoPath form with a few fields

image


The XML File Connection


Add a XML File Data Connection to an existing file in the template, I use "template.xml"

image

Save the template, and now drop into the code behind.


Code

public void InternalStartup()
{
    EventManager.FormEvents.Loading += new LoadingEventHandler(FormEvents_Loading);
}

public void FormEvents_Loading(object sender, LoadingEventArgs e)
{
    FileQueryConnection file = this.DataConnections["template"] as FileQueryConnection;
    file.FileLocation = "template.xsd";
    file.Execute();
    XPathNavigator template = this.DataSources["template"].CreateNavigator();
    string notes = "";

    foreach (XPathNavigator nav in this.CreateNavigator().Select("//*", this.NamespaceManager))
    {
        string localname = nav.LocalName;

        XPathNavigator element = template.SelectSingleNode("//*[@name='" + localname + "']", template);
        if (element != null)
        {
            notes += string.Format("{0} is of type {1} {2}; ", localname, element.GetAttribute("type", ""), element.GetAttribute("nillable", ""));
        }
    }

    this.CreateNavigator().SelectSingleNode("/my:myFields/my:notes", this.NamespaceManager).SetValue(notes);
}

  • The interesting part is at the top, where we bait and switch the FileQueryConnection to read the template.xsd schema file instead.  Because it is a valid XML file, InfoPath will read it happily.
  • We can then map any field in the main datasource to the corresponding definition in the template, and pull out the additional metadata such as type or nillable.


Result

image


Download

Making InfoPath 2010 Preview/Debug work again

Quick blog.  How I fixed InfoPath 2010 Debug/Preview error, after installing Office 2013.

InfoPath cannot open the selected form because of an error in the form's code.
InfoPath will fail to load this form because Microsoft .NET Framework 3.5 is not installed or is installed incorrectly

Install .NET Framework 3.5

First, if you are on Windows 8, you do need to install the .NET Framework 3.5 feature.  Do this via Add Windows Feature control panel.


Reverse the .NET Assembly Binding Redirect Policies

Fix these two policies that was redirecting v14 references to v15.

  • C:\Windows\assembly\GAC_MSIL\Policy.14.0.Microsoft.Office.InfoPath.Client.Internal.Host\15.0.0.0__71e9bce111e9429c\ Policy.14.0.Microsoft.Office.InfoPath.Client.Internal.Host.config
  • C:\Windows\assembly\GAC_MSIL\Policy.14.0.Microsoft.Office.InfoPath\15.0.0.0__71e9bce111e9429c\ Policy.14.0.Microsoft.Office.InfoPath.config

If you just change it to bind to the original version 14:

  • <bindingRedirect oldVersion="14.0.0.0" newVersion="14.0.0.0"></bindingRedirect>


Missing IPDMCTRL

If you see complains about ipdmctrl, copy it from:

  • C:\Program Files (x86)\Microsoft Visual Studio 11.0\Visual Studio Tools for Office\PIA\Common\IPDMCTRL.dll to C:\Program Files\Microsoft Office\Office14\

You can find IPDMCTRL in any Visual Studio Tools for Office installation.  Your directory could be different.


Use the Fusion Log Viewer tool

I figured this out using the fuslogvw tool - which logs .NET assembly loading events, and so I could figure out what it was trying to load when debugging, and failing.

image


Pics or it didn't happen

image


Here is both VS2012 debugging an InfoPath 2013 form, at the same time as VSTO debugging a separate InfoPath 2010 form.